Even the best shoe design can fall flat if your shoe photography doesn’t do justice to its curve, stitches, and structure.
Let’s be real, shoppers do not want to buy a product that hides flaws and shows only parts of the product, or those that are just too monotonous to attract anyone. Online shoppers want sharp images of the product that truly represent the real thing and attract them to buy it. Many ecommerce owners find it challenging to display shoes correctly. Not because they are complicated, but it’s because small mistakes can have a huge impact on the whole aesthetic.
However, your challenges can be resolved by following the handpicked top photography ideas and tips. We have laid out all the expertise gathered over the years of research and real-life experience for you. Let’s get into it and get ready for the perfect footwear shots.
Table of Contents
ToggleWhy Shoe Photography Matters in E-Commerce?

Online shoppers can’t touch, feel, or try on shoes before buying them. They rely solely on the product photos to make their purchase decision. That’s why shoe photography matters the most in ecommerce businesses. It also directly impacts engagement, confidence, seo, and ultimately the revenue. Here’s a detailed explanation of why it matters:
- Product images drive purchase decisions more than anything else. In shoe stores, shoppers aren’t just checking the colors and shape of the shoe; they also check the sole, stitching, material quality, texture, toe space, and more. If the shoe looks bulky, has poor texture, or is uncomfortable, no description is going to save it. 90% shoppers consider high-quality products as crucial when purchasing online.
- Photography matters for search engine visibility. The shoe ecommerce business is quite saturated and is growing day by day. The global footwear market grew from $9.21 9.21billion USD to $10.19 billion in 2025. In such a competitive market, you must be visible, and only attracting shoe photography can save you from drowning beneath a thousand stores. You can set yourself apart with innovative photography and boost search engine optimization.
- Leads to higher conversion rates. Shoe purchase decisions are often impulse-driven and hindered by hesitation. Shoes need to meet various criteria to meet shoppers’ expectations, which often makes the buying journey too long. Lucrative shoe photography ensures your customers’ interest doesn’t get lost in the middle. Research found that higher-quality images can increase conversion rates by up to 30%, which is remarkably high. When shoppers can imagine themselves wearing the product from the image alone, this is when your product photos succeed.
- It can reduce return rates. Footwear has one of the highest return rates in the e-commerce industry. The percentage can range from 17% to 35%. As sad as it sounds, the responsibility falls on the e-commerce owners. Because they do not take shoe photography seriously, this leads to unmet expectations. As soon as customers get the shoes in their hands, they notice a color difference, a different texture, an uncomfortable shoe, and a vibe that’s not what they expected. Implement better shoe photography ideas so you can actually meet their expectations and show exactly what you are offering. This will significantly reduce return rates.
- Set strong brand perception with attractive visuals. Premium shoes that are not photographed accurately look poor and impact your overall brand appearance. A well-designed shoe that is priced accurately looks thoughtful and worth the price. When your ecommerce store consistently showcases high-quality shoe photos, customers perceive your brand as luxurious and are willing to pay higher prices. One study shows that 38.7% of respondents agree that higher prices for luxury goods are justified. This is why you must include professional shoe photography in your ecommerce store and not miss a chance to emerge as a luxury brand among shoppers.
Essential Equipment for Shoe Photography

Shoe photography doesn’t require extravagant equipment; you just need the right equipment. You need to have controlled, adequate, and scalable tools to get a perfect shot every time. One right camera, lens, controlled light, and perfect editing software can make your shoe photography shine. Here’s all the essential equipment you need for shoe photography:
Camera and Lenses
For professional photography, you need a camera and lenses that can take high-quality photos and details. You need a camera that lets you control aperture, shutter speed, and ISO. Good dynamic range is also essential for preserving highlights on lighter-colored shoes and shadows on darker-colored ones. With a good camera, you can also get accurate colors of the shoes, so your customers are aware of it all before getting them.
As for lenses, they should be perfect to showcase your shoes’ proportions. Different lens sizes are good for different types of shoes. That’s why you need various lenses, like a 50mm prime lens, an 85mm lens, and a macro lens, to capture all the stitching details and texture. But avoid wide lenses at all costs, because they stretch the tow box and make it appear chunky.
Tripod
The next essential item is a tripod that is stable and heavy enough to hold your camera. A tripod keeps framing consistent across all angles. It helps with a slower shutter speed without blurring it. Also, a tripod would help you maintain uniformity, which looks professional.
Why these matters? Because your shoe images need to be clear and cohesive to make an impact on the customers’ minds. Also, shoes are quite sensitive when photographed, and even a slight imbalance in the camera can affect their overall sculpture.
Lighting Equipment
Good lighting brings life to ecommerce photos. With great lighting, your shoes can look premium. To maintain good lighting while you take shoe photos, you need continuous LED lights for a controlled studio setup and a softbox or diffuser to soften shadows and reduce harsh reflections.
The best way to capture shoe photos is in daylight, where the color temperature is balanced. As your shoes have reflective, absorbent surfaces, poor lighting can hinder the appearance of texture, create glare, or hide their depth. So make sure you are not taking your shoes’ photos in low light or being unaware of the lighting.
Light Box
If you are looking for a tool that helps you distribute light evenly, you need a lightbox for shoe photography. It helps you to get clean, catalogue-style shoe photography. It also helps you to control shadows and works great with a white background. Light boxes are helpful for small to mid-size shoes, the ones with white or transparent soles, and if you really want uniform product listings.
Editing Software
Post-production for professional photography is non-negotiable, and you need good editing software for that. It would help you refine your photos; it’s not about hiding your shoes’ flaws; it’s about making sure your shoes look presentable.
No matter which editing software you choose, it must support RAW files, provide precise color correction, offer spot cleaning, and control the background. You can select tools such as Adobe Lightroom and Photoshop, which professional photographers widely use. Good photography is about clarity, consistency, and having non-complex photos.
How to Set Up a Studio for the Perfect Shoe Photography

To set up a professional studio for the perfect shoe photography, you would need a space with a professional layout, a clean backdrop, adequate space for camera and lens placement, and a proper lighting plan. Here’s the detailed plan to set up a studio for the perfect shoe photography:
- Studio space with a perfect layout. To set up a studio for professional shoe photos, you need a clear area of roughly 3 x 4 meters. Such a space would give you enough room for lights, background sweep, and a tripod moving. Smaller rooms can also work, but you would need tight control over everything. Cover the windows properly, or use blackout curtains if needed, to control lighting in your studio space. Mixed light can cause color casts that are hard to fix.
- Clean backdrop that is clean, repeatable, and neutral. A professional ecommerce shoe photography studio background needs to be consistent and highlight all sorts of shoes. That’s why it is best to use a universally accepted white background. Such a background had both market demand and the ability to highlight all sorts of shoes. Some professionals also use neutral grey as their background. It is the second-best choice if you want something different. For premium launch or editorial shots, use this background. It would look both professional and extraordinary. Textured surfaces are rarely used, but they are perfect for lifestyle shots. No matter which background you choose, it must keep the focus on your shoes and be consistent overall. You can sometimes bring a little uniqueness with some different textures.
- Camera and lens setup to eliminate any distortion. Set up your camera and lenses with a stable tripod so that you can take steady images from all sides. Use adequate-size lenses and keep the camera far enough away so the shoes fill the whole frame without using any wide-angle. Using a wide-angle lens can distort the features and proportions of the shoe. Make sure your tripod is flexible enough to adjust to any height. As you will be moving the camera a lot to take side eagles, you do not need to struggle when taking photos.
- A lighting setup for the perfect product shots is essential. A studio gets life with the right lighting. You can follow a simple three-light or two-light approach depending on the shots you are taking. For the two-light method, you can use a large softbox at a 45-degree angle to the product, slightly above shoe height, to reveal its texture. For this method, both continuous LED and strobes work. On the opposite side of the light, use a reflector to enhance shadow detail. You can use white cars, a silver reflector, or a second softbox with lower power. As for the three-light method, you would use a small softbox and add a black rim behind the shoes to separate them from the background and emphasize the sole. No matter which method you use, just remember diffusion is your friend and do not match color temperature.
- Support clamps and invisible mounts are crucial for shoe photography. To ensure your shoes can hold their shape, use tissue or foam. This way, the shoes would retain their natural shape, and any creases would be gone. For support during the shoot, your studio needs invisible supports. Using small, clear acrylic stands, museum wax, or fine monofilaments to float your shoes gets you the best shots. No matter what kind of shoe photography you would be doing in the studio, you need these support elements so your shoes look aesthetic and professional.
By following these steps, your professional studio for perfect shoe photography is almost ready. You just need a reliable post-production support. Instead of hiring a whole team, it is best to outsource professionals who can handle the entire thing. Companies like Graphic Aid are hubs for post-production crews and professionals who would make your overall journey 10 times easier. So, instead of going through all the hassle of setting up an entire team, why not just hire outstanding professionals and get your shoe photography to come to life!
Top Shoe Photography Ideas for Creative Footwear Photos
Great shoe photography isn’t just about showing great images of the products; it’s about communicating the fit, function, and trust to the buyers. But static, generic photos can be monotonous for customers; you need to add variety and creativity to the photograph to get the most out of it. Here are the best shoe photography ideas for creative footwear photos:
Classic White Background Product Shots

You might often find yourself asking why my footwear photographs do not look like those of other luxury brands; the answer may lie in your photo background. A classic white background is used across most luxury brands to highlight the products and truly make them stand out. Clean, distraction-free images of shoes, this is what you achieve through white background product shots.
Ecommerce marketplaces like Amazon and Shopify set a White background as the gold standard because it removes any distraction from the product. It also ensures that the product color is accurate, the details are precise, and the shape is in focus. All of these are crucial elements of shoes. One detail missed might result in a lost customer! So, white-background shoe photography would help you avoid visual bias, meaning the shoes would be the star, not the background.
As online customers scroll quickly, a clean, floating white image would ensure instant attention to the product and prevent any customers from missing it. To accurately get the product photo on a white background:
- Use seamless white paper, vinyl, or acrylic.
- Place the shoe flat on the surface at a slight angle to show the product’s depth.
- Use soft diffused lights from both sides.
- Keep a soft grounding shadow under the sole. It would keep some shadow to give it a real feel.
- Make sure the product covers 80-5% of the frame so the shoe is centered.
Avoid:
- Over-editing the image, or removing the shadows too much.
- Do not use an uneven white background.
- Wide-angle lenses might distort images.
Lifestyle Shoe Photography
Showing shoes in use in a real environment is called lifestyle photography. For that, shoes can be shown on feet, in motion, whether running or walking, to highlight their real use. Lifestyle product photography gives your online product a real feel. Customers can truly relate and imagine themselves actually using it.
Lifestyle shots create a bridge between static images and live experience. They answer customers’ questions and reduce any purchase anxiety they might have. They get their answers to the questions ‘how these shoes would look on me?’ or ‘will these shoes feel comfortable?’ Most photographers, amidst that aspiration and relatability, sell the most. As lifestyle product photos provide customers with the inspiration to use the shoes in the right place and relevance they seek before making the purchase, it increases the chances of selling the most.
Also, lifestyle shoe images tell the customers a story. Whether it’s a city walk-themed photograph or a gym session on the treadmill, buyers see a story being told. So it’s a perfect opportunity to show both the potential and usability of your shoes. Here’s how to take lifestyle images:
- Match the environment to the shoe’s function.
- Shoot during daylight for realistic images.
- Keep the shoes at the focal point and treat the background as support so neither competes.
- Capture wide context and tighter shoe-focused shots for versatility.
Avoid:
- Taking photos in a generic environment that doesn’t really match the shoes’ vibe.
- Overstyling scenes that distract attention from the footwear.
Flat Lay Shoe Photography
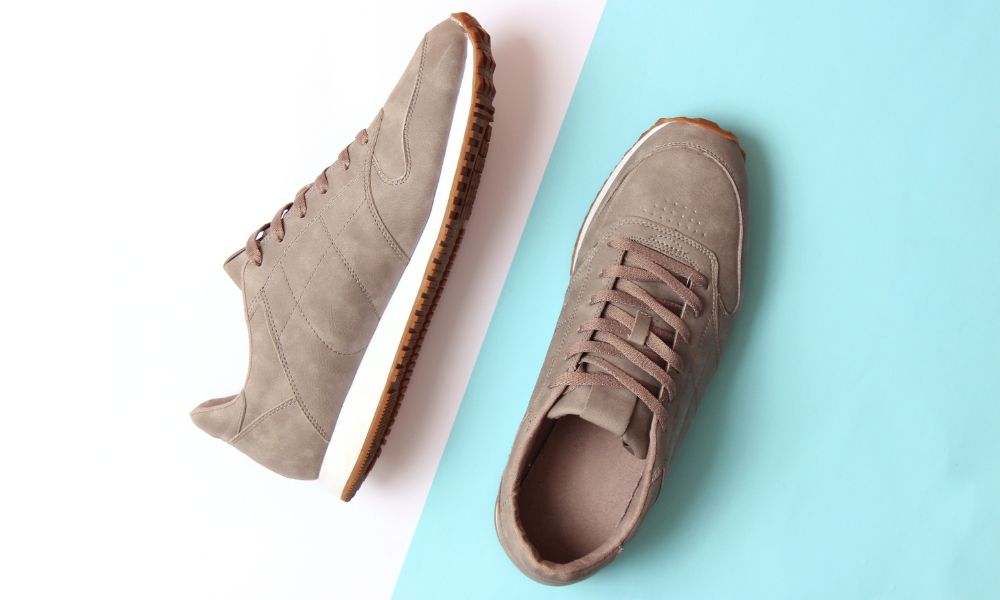
Taking photos of shoes directly from above, while the shoes are arranged horizontally on a flat surface, is what flat lay shoe photography is. You might think it looks plain and not creative enough, but let me tell you, making a shoe look attractive flat on the surface is a truly unique form of photography.
This style shines when paired with accessories or an outfit that complements the shoes. Although various opinions about flat-shoe photography might make it look lifeless and hide depth, professional ecommerce photographers are still using it. Pairing of complementary elements gives the shoe photos a visual context. As your online customers want to see every aspect of your product, flat-lay shoe photography truly fulfills their needs. It gives a clear view of the design, laces, material, and pattern from above. When used at the right place, it is effective and visually engaging. To take a professional flat lay shoe photo:
- Arrange shoes naturally on the surface; do not make it look forced.
- Use neutral brand-aligned surfaces.
- Keep spacing consistent.
- Make sure the lighting is perfect from above to avoid any harsh shadows.
Avoid:
- Using flat-lay as the only product angle throughout, use variations.
- Overcrowding the surface with too many props.
Floating Shoe Shots

This is one of the most visually stunning techniques for shoe photography. Here, shoes are presented as if they are floating in mid-air. It is done using transparent support or post-production masking.
Floating shoes add visual satisfaction and break the monotonous vibe of flat product photos. They create a sense of motion among your ecommerce store product photos. So it draws eyes and keeps the customers on hook. The floating shoe shots are especially popular with sneakers and streetwear. This shoe photography technique is also popular because buyers love anything in motion; they subconsciously associate motion with performance, energy, and lifestyle. This is why it makes your shoes look premium and full of energy. Here’s how you can take floating shoe photos:
- Start by supporting the shoes with a thin wire or acrylic stand.
- Shoot the product with controlled lighting to maintain natural shadows.
- Remove the support in post-production carefully.
- Keep the photo orientation realistic so the shoe looks like it’s floating naturally.
Avoid:
- Over dramatic angle photos, it looks unnatural.
- Taking shadowless pictures as it does not align with the natural flow.
Detailed Close-Up Shots

Close-up shots are crucial to highlight your shoes’ intricate details. Get tight shots on shoe stitching, mesh waves, sole tread, logos, and materials to really highlight details for the customers.
The web is full of casual scrollers and tons of options, to turn the casual scrollers into buyers and compete with all other competitors, get really detailed, close-up shots of your shoes. This way, you can showcase exactly what matters to customers. Clarity, this is what you provide with detailed shots. With such shots, you build credibility and transparency, which can increase conversion and bring you loyal customers.
Also, customers look for incredible craftsmanship to consider a pair of shoes as premium, and the only way to showcase what your shoes actually contain is a detailed shot. To get the perfect, detailed close-up pictures:
- Use a macro or telephoto lens and follow the macro photography guide.
- Light from the side to reveal texture.
- Keep the focus sharp, as blurry photos reduce trust.
- Capture the details customers actually care about and what is actually unique about your shoes.
Avoid:
- Taking random details of the shoes that have no relevance.
- Over-sharpening the details in post-production would start to look unnatural.
Mirror and Reflection Photography

This method involves placing shoes on reflective surfaces to create an elegant mirror-like reflection. Adding reflection to your shoe photography adds dimension and keeps the focus on the shoes. Although it might sound like taking away from the actual shoes, in reality, it creates more surface for the shoe photo.
The mirror and reflection produce sophisticated imagery. This is also used in premium branding, so it makes your shoes look expensive. The reflections also help viewers understand the shape and details in a single frame. To take a perfect mirror and reflection photo of your shoes, here are a few tips you need to follow:
- Use a clean acrylic or glass.
- Control the reflection of shoes with flags.
- Keep reflection subtle and proportional.
- Ensure the surface is spotless.
Avoid:
- Distorted reflections.
- Scratched or dirty surface.
Using a Model (On-Foot Shots)
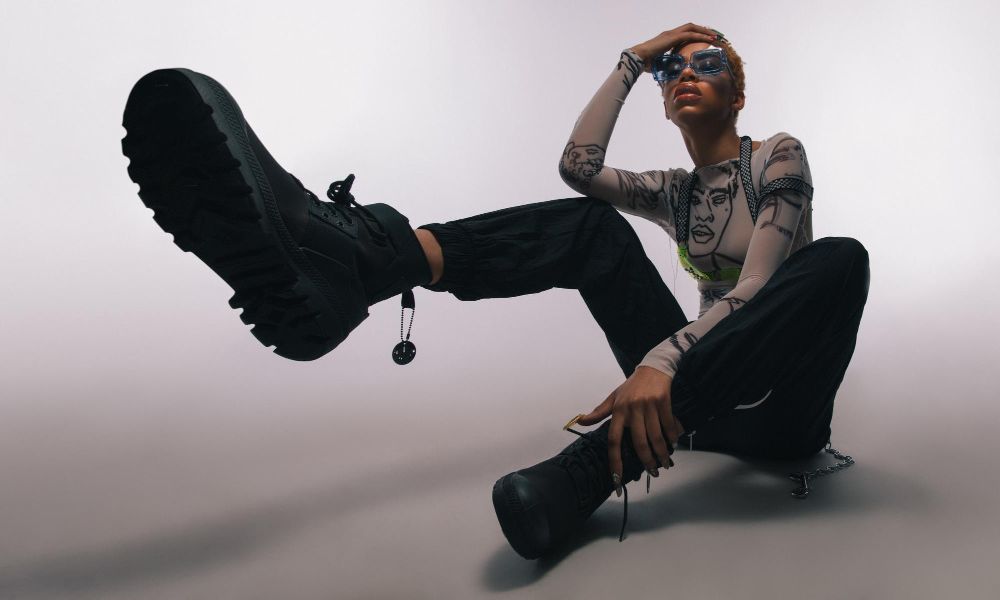
Another very creative but effective way to showcase your shoes is to make a model wear them. It would show the shoes’ proper fit and proportion. Also, seeing a model wear the shoes makes customers feel confident in buying them. When purchasing online, customers hesitate most about the structure and texture of the shoes.
Taking photos of the shoes on a model communicates scale, posture, motion, and comfort. It also answers every customer query. Studies also suggest that including human context can significantly increase purchase intent. The model photos help them visualize themselves wearing them. Here’s how you can take professional photos using a model:
- Choose models who are aligned with your targeted audience.
- Capture photos like standing, walking, and angled poses.
- Make sure the shoes are the focus of attention.
- Ensure the background is neutral.
Avoid:
- Poor framing that potentially hides the shoe.
- Mismatching environment and model.
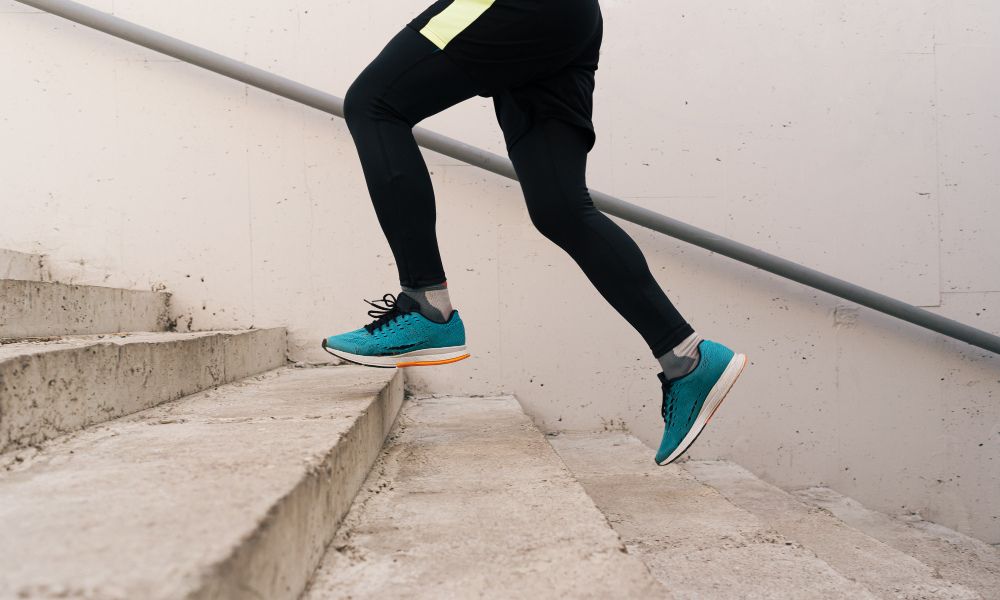
Action Shots for Sports Shoes
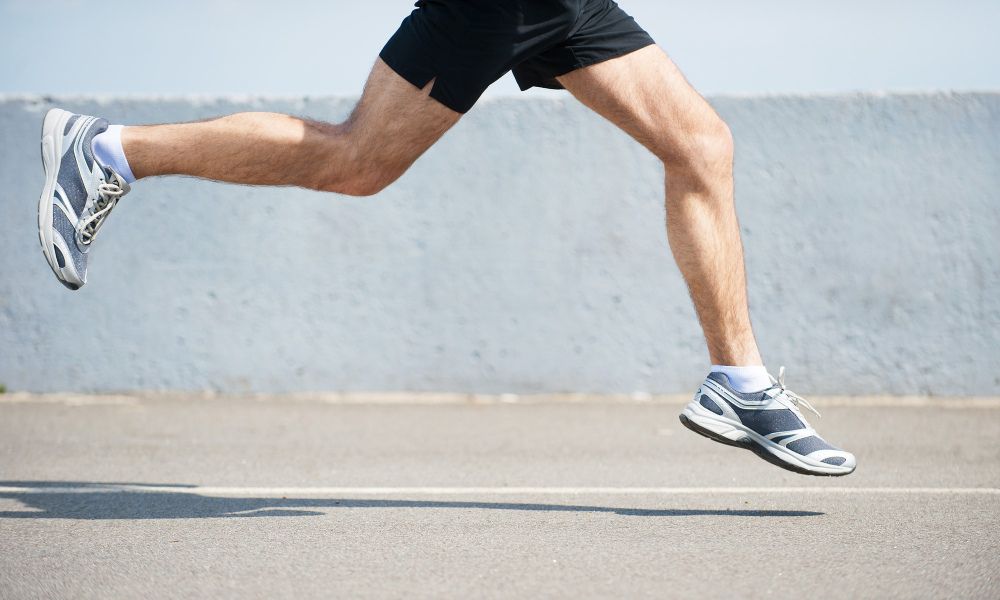
Shoe photography must match the shoes’ potential and how they are meant to be used. Action shots are great for sports shoes. In this method, shoes are photographed in motion, running, jumping, pivoting, and many more. Action shots are great to show the energy those spirit shoes carry. It is also vital in sports shoes because it conveys functionality, flexibility, and purpose.
Buyers of sports shoes want proof of the performance and flexibility. Action photos communicate the energy and context better than static shots. Here are some ways to take the action shots better:
- Use a fast shutter speed for the shots.
- Freeze motions or add controlled blur intentionally.
- Use an athletic environment to take all the product shots.
Avoid:
- Motion blur that can hide shoe details.
- Unrealistic movements.
Shoe Photography Tips for a Clean and Attractive Look
Clean, attractive shoe photography does not necessarily mean it will include many elements or sharp editing. In reality, it means shoe photos that communicate more effectively and clear up customers’ doubts. Here are a few shoe photography tips you can take a look at:
Clean the Shoes Properly
Ensure the shoes are cleaned properly before you take the photos. Dust, lint, fingerprints, or minor scratches can be far more visible on photos than they look in real life. High-resolution images would capture every detail, even the ones your naked eye is not bothered by. To ensure your shoe photos come out clean and professional, clean them properly and remove all the dust. Unclean shoes often degrade product photos, even when using the best equipment. Cleaning shoes reduces visual noise and signals product quality, increasing trust.
Use Soft, Even Lighting
Incorporate soft, even lighting to preserve the shoes’ texture. Avoid harsh light that could flatten the texture of materials like leather or suede. At the same time, uneven lighting would distract from the shoes, highlighting parts that should not be the focus. Diffused lighting with softboxes or lighting tents can help you preserve the texture without exaggeration. Using such lighting is also standard practice in the photography industry. Using soft light reveals stitching, grains, and fabric weave properly. It helps buyers understand the material clearly and the quality you are offering before they buy or hesitate.
Proportionate and Angled Shots
Maintain natural proportions and angles to get the perfect shots. In terms of shoes, the structure and shape matter the most. To get the proportion of the shoes right, you need to maintain natural angles while taking the photos. Professionals also suggest avoiding wide-angle lenses and extreme perspectives because they can distort the shape of the shoes. Taking pictures at eye level or slightly above eye level actually shows what the shoe would look like in real life. Accurate proportions in photos matter because customers decide whether to buy based on these photos in ecommerce. So if you are not showing your shoes in the correct proportions, it would dissatisfy customers once they receive the product in hand and increase return rates.
Avoid all Visual Distraction
Limit visual distractions while taking shoe photos. Taking clean, attractive shoe photos largely depends on how well you can keep the focus on the shoes. Neutral background, minimal props, and consistent color palettes all contribute to a clean photograph. All because they do not shift the customer’s attention away from the shoes. Cognitive research in the ecommerce industry shows that fewer visual elements help buyers to process product information faster and with more confidence.
Post-Production is Necessary
Edit shoe photos to correct and polish, not to transform. Post-production of your shoe photos must not alter the overall vibe of the initial image. It makes shoe photos look unnatural and fake. You should touch up the product photos and focus more on color correction, exposure balance, or dust removal. You should never make the photos appear extra crispy, sharp, or add fake shadows. Even if your customer gets a slight hint that the product photos appear fake, they are most likely to abandon the shopping midway.
These tips would help you get really attractive and clean shoe photography. To ensure your ecommerce product photos, you should always follow professionally picked photography tips.
Common Mistakes to Avoid in Shoe Photography
Your shoe photography might look bad, not because you did not have a good studio setup or equipment, but because of these small, avoidable mistakes that reduce trust. Here are the most common mistakes that you need to avoid in shoe photography:
Using Distorted Angles
Using distorted angles that change the shoe’s shape and composition. Many ecommerce owners make the mistake of using wide-angle lenses or extreme perspectives in their photos. It makes the toe box look oversized, and the heels of the shoes look compressed. Such misinterpretation hinders your shoes’ overall proportions and sways away customers.
Too Much Lighting in The Studio
Overlighting the studio, making all the shadows disappear. Lighting is crucial for shoe photography, but only balanced lighting is needed. You might think the more light you have, the better your shoes would look, but in reality, overlighting removes all essential shadows, leaving them looking flat. Shadow relates the product photos to reality, so that customers see the images as artificial and perceive them as low-quality and lacking credibility.
Mismatched Colors
Ignoring color accuracy is the biggest mistake. Incorrect white balance or heavy filters can shift the colors of your shoes. If your shoes are made of leather, suede, or fabric, they are most affected by color inconsistency. Mismatched color in pictures and real life would be the biggest bummer for the customers, and they are likely to return the products. Apart from that, it also hampers your brand credibility, and customers will not come back after experiencing such inconsistency. So you must ensure your shoe photographs match the real color.
Inconsistent Environment
Inconsistent image environment or aesthetics. In professional product photography, consistency is the key. Different angles, inconsistent lighting styles, or background tones across product photos create visual confusion. Shoppers tend to compare images side by side, and inconsistencies make them question product quality.
Essential Post-Production Tips for Shoe Photography
Post-production of images includes clarifying details, correcting minor issues, and delivering the refined version of your images to customers. Right editing makes your shoe photography pop. Here are some essential post-processing tips for your shoe photography:
Correct Lighting and Exposure
Correct your lighting and exposure before publishing the photos. Even the best shots can look flat without proper exposure correction. Adjust the brightness, contrast, highlights, and shadows of the image so it looks natural. To ensure your photos look lively, use levels and curves to expand the tonal range and preserve the texture of the shoes. Also, avoid extreme exposure changes that can hide the details of the shoes.
Use Accurate Colors
Using accurate colour correction matters more than just pretty colors. Your shoes need to look exactly how they do in real life. Avoid colors that can lead to returns and disappointments, which can turn into lost trust. To achieve accurate color correction, set the correct white balance. Ensure precise color consistency across shots, and must check how color is displayed on different devices. Shoes often have mixed materials, and each of those reflects light differently. While color correcting, keep that in mind too.
Clean-up and Isolation
Background cleanup and isolation are crucial to keep shoe photography professional. A consistent background is the central aspect that says your photos are professional and you value what customers see. You can achieve a clean background by removing distractions such as wrinkles, unnecessary shadows, and other unwanted elements. For very polished results, it is best to rely on a professional service like Graphic Aid. Their dedicated professional team would help you clean background, precise clipping paths, shadow creation to bring back dimension and help with image masking. Such post-processing would truly make your images pop.
Refine Details
Refine details without oversharpening shoe images. Sharpening the edges and texture of the shoes makes the materials and stitching stand out clearly, especially on a phone screen. To achieve a detailed image, apply selective sharpening to key areas and avoid global sharpening that increases noise. Professionals advise you to use sharpening layers to toggle intensity and preserve a natural appearance.
Frequently Asked Questions (FAQs)
What is the best angle for shoe product photography?
The best angle for shoe photography is 45 degrees. This showcases almost every aspect of the shoes, from the shoes to the heels, and customers can get an idea of all of them. Matching the buyer’s way of thinking would give you an edge in the ecommerce industry.
Which lighting setup is best for Shoe photography?
A soft, diffused light setup works best. The two-light source method is the best option for shoe photography. This setup reveals the texture and shape of the shoes without any harsh shadow or glare.
What is the best background for shoe product photography?
A clean white or neutral background is best for shoe product photography. It removes distractions and highlights the shoe’s shape. It also ensures color accuracy.
What is the ideal camera setting for shoe photography?
The ideal camera settings for shoe photography are a low ISO and an aperture between f/8 and f/11 to maintain sharp detail. Also, adjust the shutter speed based on the lighting. You must use a stable tripod all along to get balanced images every time.
Conclusion
In conclusion, shoe photos are crucial for attracting customers to your store. It also relates to customers’ trust and purchase decisions. But it is not that simple if you do not know the first thing about shoe photography. To get professional shoe photos, you need accurate equipment, proper techniques, and a clear understanding of which aspects to avoid.
In this blog, we have discussed all the pro tips you might need for your shoe photography. With such tips and professional guidance, you will surely get perfect shots.