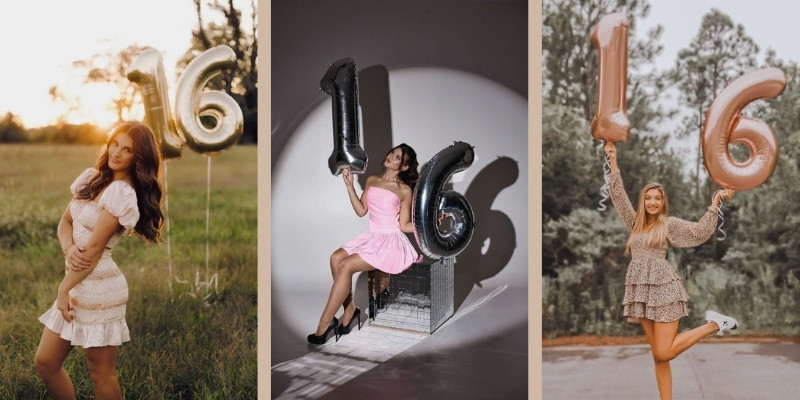
Sweet 16 photos are something that takes everyone to the lovely moment when they stepped into a new journey of life. But if you don’t consider the best sweet 16 photo ideas now, you might risk someone’s once-in-a-lifetime moment!
Every successful sweet 16 photoshoot has one thing in common: there’s an invisible structure behind it. Be it the backdrop that isolates the subject, a prop that creates a natural hand placement, or a focal point that guides the viewer’s eye.
Most people might miss it and only realize when it’s not in the photos. This best sweet 16 photo ideas guide is designed to provide the foundation and structure you need. Follow this perfectly, and you will have the best photos that will always take them back to the special moments.
Table of Contents
ToggleWhat is sweet 16 photography?

Sweet 16 photography is about capturing the moment that will come only once in life. This is the time between being a kid and stepping into the next stage of someone’s adulthood. It is more meaningful than just taking birthday photos. Some even see the sweet 16 photography as preserving confidence, personality, and the feeling of a day that will last for years.
So what makes a sweet 16 photoshoot so different from all the other event photos, you might ask? It’s the intention of the photoshoot. Every detail in the frame of this photograph has a purpose. The background is not just something standing in the back; it keeps the attention focused on your subject. Props are used not just to hold it all together, but to improve posture or create natural movements. Even the camera angle you hold in matters when you are taking sweet 16 photos. Also, there are a few things you need to keep in mind while taking Sweet 16 photography:
- The photos need to be balanced.
- They must look polished, but not stiff.
- They should look fun, not chaotic.
- Everything should be planned, but it must look natural.
- Think about the environment, lighting, and the flow of the shoot beforehand.
When these types of photos are taken, they usually combine two photography styles: one for sharing with the family and the other to tell a story. Combining both in a balanced way makes such photographs truly stand out and makes it a memory of a lifetime.
Indoor or Outdoor Sweet 16 Photoshoot: What’s the Better Choice?
Choosing between an indoor and an outdoor sweet 16 photoshoot is not just about which looks prettier. It’s about control, comfort, and the results that you want from the photoshoot. Both are great options, but they work very differently. Let’s see how both work:
Indoor Photoshoot
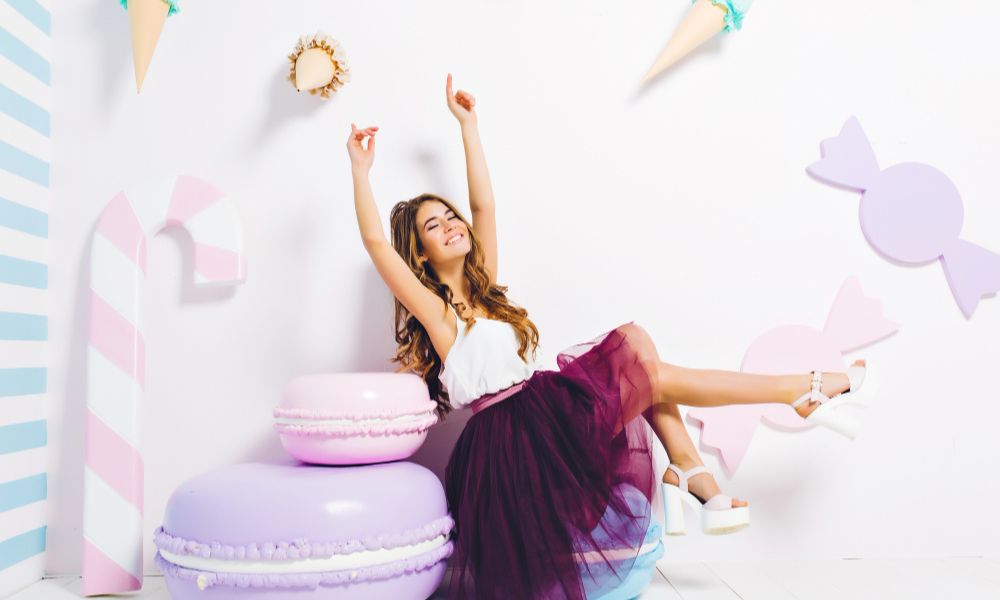
An indoor photoshoot is best for one particular thing: control. You can control the light, the background, and how the space looks in every frame.
As for lighting, the indoor space can be shaped. You can use window light for natural light or even use artificial lights to keep the shadows gentle and light the subject evenly. This is especially helpful for close-up portraits and detailed shots.
When it comes to background, you can use walls, backdrops, or themes to keep it consistent across every photo. It makes the entire gallery feel cohesive instead of just random pics. You can also remove visual clutter very easily and keep attention very focused on the birthday star.
Also, some might feel uncomfortable taking photos in the open, be it because of the heat or the crowd. In indoor photography, your subject would not have to worry about any of that. Their hair and makeup would stay intact longer, helping maintain a very polished look. Indoor photography shines the most when you want:
- Formal and theme setups.
- Close-up portraits of the subject and posed group shots.
- Evening events where natural light is limited.
Indoor photography has some limitations too:
- Small crowded rooms can feel tight in photos.
- If you can’t set up enough lighting, photos can turn out blurry.
- Without a proper background setup, your images may look less dynamic.
Outdoor Photoshoot
Outdoor shots particularly revolve around one main thing: natural light and open space.
When it comes to lighting an outdoor photoshoot, sunlight adds depth and dimension that is very difficult to recreate indoors. When the light is used well, especially during early morning or late afternoon, it creates soft highlights and natural skin tones.
Another great aspect of an outdoor photoshoot is that the open area helps you take walking shots, spinning dress shots, or maybe a wide group photo. Such shots create a sense of energy and freedom in your sweet 16 photography, making it feel more candid and less staged.
You can use gardens, rooftops, beaches, or parks as your background. They don’t just act as the background; they feel part of the story. Also, the environment helps you set the mood, so there will be no need for heavy decor. Outdoor photography shines the most when you want:
- Daytime celebration images.
- Take large group photos with friends and family.
- Natural, lifestyle-like portraits of the subject.
You must remember these limitations too before choosing this photography method:
- Outdoor lights change constantly, so your photos can appear inconsistent.
- Harsh sunlight can cast a strong shadow, which isn’t always ideal.
- Weather or wind can affect the appearance of your subject or decorations, making it difficult to maintain consistency.
Verdict: Now that you have seen the advantages and disadvantages of both indoor and outdoor photography methods side by side, you can choose the preferred method based on your requirements. Although there is no universal best one among them, one of them is much superior for professional sweet 16 photo-taking and preserving such an important moment.
If you want controlled, polished, and consistent results, an indoor photoshoot is definitely the best option. However, if you really want something natural and flowy, you must go for an outdoor photoshoot and worry less about appearance consistency.
Top 20 Sweet 16 Photo Ideas for Indoor & Outdoor Photoshoots
Now let’s see the top sweet 16 photo ideas that really work. You will find both indoor and outdoor photo ideas here, which can make your photoshoot memorable and professional.
1. DIY Photo Booth
This is ideal for indoor, group shots, and candid fun shots.
DIY booths are great for gathering everyone and taking quick, fun photos. By creating DIY photo booths that perfectly suit the sweet 16 era, you can make the photos pop. Instead of thinking of a booth just as a backdrop, treat it as a place where people naturally gather. Make sure the background is clean, and the light is soft.
2. “Walk Into 16” Shots
This is another great photoshoot idea for indoors.
Every sweet 16 photoshoot must include this idea in its list. This is a symbolic moment that captures the moment of stepping into a new stage. You can take all sorts of walking into the sweet 16 era type photos. You can set up a short walkway with doorway curtains, a balloon arch, or a garden path and photograph the birthday star walking through it.
3. Disney-Inspired Shots
This is best for both indoor and outdoor use and is great for a thematic photograph.
Many want to recreate the exact Disney princess look and take their photos, which is great, but not as innovative. Rather than recreating a specific princess, borrow the atmosphere. Use soft tone, gentle light, and a sense of quiet confidence.
4. Architecturally Attractive Venues
This one is an indoor photoshoot idea for the sweet 16 photoshoot. Here, you must choose an architecturally attractive structure. The process is simpler than any other one of them but you need to be prepared beforehand. Staircases, doorways, and wide open walls create natural lines that draw attention where it matters. Position the subject where this architecture quietly makes it the focal point.
5. Thematic Decors & Props
Best for indoor photos. Using thematic decor is the best way you can highlight the fun and energy of the sweet 16. You can either use a whole lot of props or use them for a purpose. Using thematic decor and props works best when photographing such a valuable moment. A small bouquet, a simple sign, or a piece of decor can give hands a purpose and shoulders a reason to relax.
6. Turn the Cake into a Story
This can be an indoor and an outdoor photoshoot idea. This can be the best prop to use during the photoshoot. You can showcase the transition from childhood to adulthood with the cake. When taking photos with a cake, place it slightly forward and lower than the face. The best moment to take such pictures is right before candles are lit, wished, and blown out.
7. Cake Smashing Moments
This is for personality and energy. It breaks up the gallery so it doesn’t feel like 50 posed portraits in a row. The key is controlling the chaos so it stays playful, not messy and stressful. You need to use a small smash cake or cupcakes so it’s easy to clean and less overwhelming. Set up in a clean area with good light and a simple background.
8. Friends and Family portraits
Family and friend photos are the most important ones. They are the ones who would be busy running errands, but you must not leave them out of the photoshoot. When taking family photos, flat rows look stiff, but layered posing looks natural and flattering. Just place the birthday star in the center. Take one classic “everyone smiling” shot and pair it with birthday star with mom, dad, mom-and-son photos, siblings, and best friends’ fun moments.
9. Mirror & Reflection Shots
This is another great indoor sweet 16 photo idea. Reflection shots instantly make your photos look more creative, and they help the subject loosen up because the moment feels less formal. Mirrors also let you capture two perspectives in a single frame, adding depth without fancy equipment. To get the best shot, use a full-length mirror, decorative venue mirror, window reflection, or even a glossy hallway wall.
10. Candid Homey Portraits
This sweet 16 photo idea truly captures the real joy of the moment through candid shots. Getting ready, laughing with friends, final touches, and quiet confidence before the party starts are magical moments. These photos matter because they feel personal and honest, not staged. They add storytelling to the gallery, balancing the polished portraits.
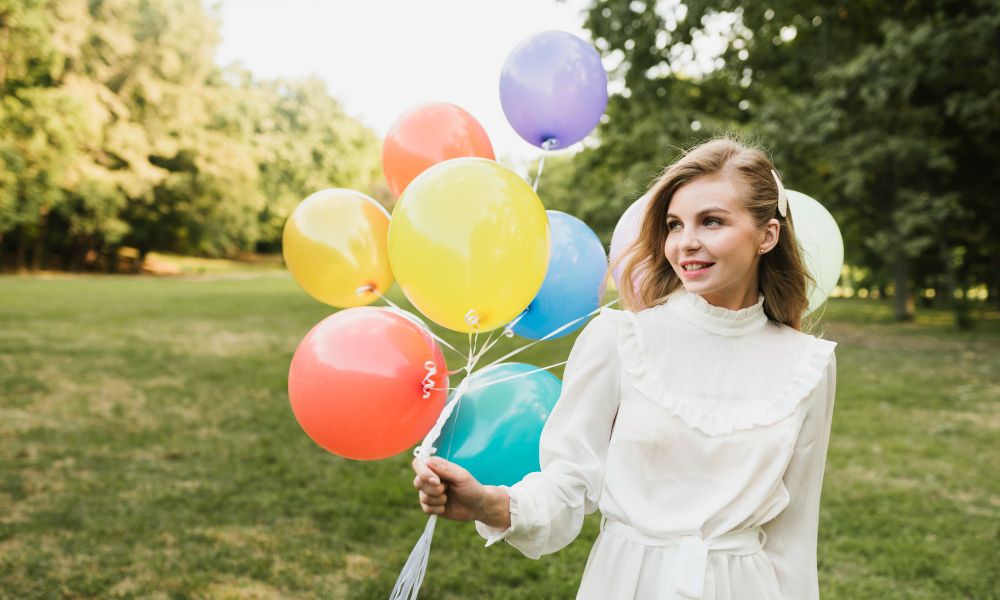
11. Golden Hour Nature Shoots
Golden hour is the easiest way to make sweet 16 photos look soft, warm, and professional. The light flatters skin, reduces harsh shadows, and makes the whole scene feel dreamy without heavy editing. If you only do one outdoor segment, it must be during golden hour.
Position the subject so that the sun is slightly behind or to the side, not directly overhead. Use trees or buildings to block harsh light if needed.
12. Beachside & Lakeside Photoshoot
Water backgrounds give your sweet 16 photos instant elegance because they’re simple and open, making the photos feel like a real “session” rather than just party pictures. The key to getting the perfect shot is keeping your composition clean: straight horizons, open space, and the subject clearly separated from the background. Shoot slightly lower so the water becomes a clean backdrop. Let the wind work in your favor so the hair moves and the dress flows.
13. Urban & Street Style Photography
This idea is perfect for confident, modern vibes. Urban photos feel bold because clean walls, city lines, stair rails, and street textures add attitude without needing props. The best street-style sweet 16 photos look like a fashion shoot, because they are simple, sharp, and intentional. Pick backgrounds that are bold but not messy; something like murals, clean brick walls, parking garages, storefront lights, empty staircases, or alleyways with leading lines are perfect.
14. Sparkler & Light-Trail Shots
Sparklers instantly add celebratory energy and resolve all awkward poses, making the photos feel more alive. Use this photoshoot idea during dusk or evening, or in a dim indoor space with a clean background. Keep the birthday girl a few steps away from the background so the light doesn’t create messy shadows. The key is keeping it controlled and safe.
15. Picnic Vibe Moments
Picnic setups are underrated for a sweet 16 photoshoot because they create natural posing without forcing anything. People automatically sit, lean, reach, and laugh, which gives your photos relaxed movement and real expressions. It’s also one of the easiest ways to create a styled look without heavy decor. Use a blanket, a basket, and a few matching items like fruit, flowers, or drinks. Keep it minimal so it doesn’t look cluttered.
16. Glamorous Red Carpet Shots
This idea works because it gives the birthday star a “main character” moment. When someone feels like they’re walking a runway, their body language changes naturally; confidence comes out without you forcing stiff poses. Create a simple step-and-repeat backdrop or a clean wall, then add a light source facing the subject. Even a phone flash can work for a paparazzi feel, but soft light will look more elegant.
17. Enchanted Garden Storybook
This is softer than Hollywood and more romantic than a Disney vibe. It’s built around delicate details like florals, warm lighting, and a gentle pose that feels timeless. You don’t need expensive styling, just a consistent mood. Use fairy lights, flowers, or greenery in a clean arrangement. Add variety by having the subject hold a lantern, sit on a bench, or stand under a floral arch.
18. Vintage & Retro Vibes
Retro themes work because they give the photos a sense of identity, making them feel like a “chapter” rather than just random shots. It also gives the subject a clear attitude to play into, helping expressions look more natural. Choose one retro element: a record player, vintage sunglasses, an old camera, a classic car, or a retro outfit detail. Keep your color palette consistent. The more consistent the vibe, the more professional the gallery feels.
19. Fantasy Concept Shots
Fantasy concept shots look best when you keep them simple and focused. You don’t need heavy costumes; just one strong element like shimmer fabric, pearls, or flowing textures can create the fantasy effect without overwhelming the subject. Shoot near water in a safe spot, aiming for soft light, either shade or the golden hour. Mix dreamy “looking away” frames feel powerful, not just soft.
20. Color Burst Shoots
This is one of the easiest ways to make a sweet 16 photo gallery look cohesive and high-end. When colors match, everything looks intentional, even if the poses are simple and the setup is minimal. Pick 2–3 colors and repeat them through outfits, balloons, props, and backdrop. Keep the background clean so the colors pop. Take a mix of solo portraits, group shots, and detailed photos.
Common Mistakes to Avoid in Sweet 16 Photoshoots
Sweet 16 photography is very emotional, so you must avoid any mistakes. Here are some common mistakes you need to avoid for this type of photography:
- Shooting without a simple plan: A sweet 16 shoot doesn’t need a full-on production house, but it does need a direction. Without a quick shot list, you’ll end up with 80 random photos and still miss the important ones. Decide early what kind of photos you will take: solo portraits, friends, family, a cake sequence, one “wow” idea, or a mix of everything. That’s enough to keep the shoot smooth and complete.
- Ignoring the background: Most bad photos aren’t bad because of the camera, they’re bad because of what’s in the background. Chairs, bags, food tables, wires, random people; all of that steals attention fast. Before every shot, do a two-second frame check and clear the mess. Because a clean background = instant upgrade.
- Using harsh overhead light: Overhead light creates under-eye shadows, shiny skin, and dull colors. Indoors, avoid strong ceiling lights alone and use window light or add a soft lamp/ring light in front. Outdoors, don’t shoot in direct midday sun if you can help it. Move to shade or wait for late afternoon so the light actually flatters the face.
- Making everything too posed: If every photo is “stand here, smile, don’t move,” the gallery starts to feel stiff and repetitive. Mix in movement and prompts: walking, turning, laughing with friends, adjusting jewelry, looking away, then looking back. Those small actions create natural expressions without turning the shoot into chaos.
- Over-editing the photos later: Heavy filters, extreme smoothing, and overly warm tones can make the photos look unnatural and dated fast. Keep edits clean, just correct exposure, soften harsh shadows, adjust white balance, and keep skin texture real. The goal is to polish, not plastic.
Post-Production Tips for Sweet 16 Photos

Sweet 16 photos come to life with the right post-production. Here are some post-production tips that would make your photos vibrant and perfect:
- Cull first, then edit: Before you touch sliders, pick the keepers. Remove duplicates, blinks, and near-identical shots so you’re only editing photos that actually deserve your time. A tighter selection always looks more professional than a huge set with repeats.
- Fix exposure for faces, not the background: Sweet 16 photos are about the person, not the background. Brighten the face first, then pull back highlights if the dress or balloons get too bright. If the background looks a little darker but the face looks great, that’s usually the right trade.
- Lock your white balance early: Nothing ruins a gallery faster than skin tones changing from photo to photo. Pick one good “reference” image and match the rest to it so the whole set feels consistent and natural (not orange, not green).
- Retouch lightly and keep skin real: Remove temporary things like a pimple, lint on the dress, lipstick smudge, but don’t blur skin until it looks plastic. The goal is “polished,” not “filtered.” A clean face with real texture always looks more expensive. To ensure you do not ruin the perfectly taken photos, seek help from a professional team like Graphic Aid to ensure you get the right post-production service.
- Keep the color style simple: Choose one clean look and stick to it. Heavy filters date photos fast. If the dress is a certain color in real life, keep it close. Sweet 16 photos should still feel like her day, not a preset.
Conclusion
A great sweet 16 photoshoot comes down to three things: a clean setup, simple guidance, and real moments. Use the photo ideas to keep posing easy, backgrounds consistent, and the shoot flowing without stress.
Mix polished portraits with movement shots and emotional frames (friends, family, cake, and reactions) so the gallery tells a full story, not just poses. Then finish with light, natural editing, straighten, crop cleanly, match skin tones, and retouch the photos gently so everything still matches the subject.