Have you noticed flawless, natural, and smooth skin tones of model portraits in magazines and billboards? Do you want to behold the art of portrait retouching or professional headshots of models, where beauty meets technology and creative imagination?
One of Photoshop’s most common and creative editing techniques is retouching a model’s face. But to make it natural and professional, you must adopt the right tools. Post-editing or post-processing plays a significant role in transforming an image to its realistic outlook.
So come, let’s discover How to Retouch Skin in Photoshop guide. We’ll delve into the steps that can elevate your photos or portraits, editorial photography, and more to a whole new level.
Ready to join this amazing adventure? Let’s dive in!
Table of Contents
ToggleWhat Does Retouching A Photo Mean?
Photo retouching is the process of removing specific flaws and enhancing its visual appeal and quality. It goes beyond several photo editing techniques like color adjusting, imperfection removal, resizing, and more.
On the contrary, skin retouching, or Photoshop skin retouching, removes flyaway hair, wrinkles, blemishes, and many other edits to give portraits a natural and amazing appearance. This image editing also indicates beautification processes that give model photos a virtual makeover.
Sounds exciting? Do you want to explore how to professionally retouch skin in Photoshop for fashion photography, headshots, magazine covers, and others? Before that, let’s check the key importance of Photoshop skin retouching in the next section!
Why is retouching skin important for your image?
A vibrant, professional image with appropriate color attracts buyers to visit your online store. Just like product images, model portraits will only be appealing with post-production and are done perfectly.
Here, we’ve listed the key importance of skin retouching in Photoshop below:
Correcting imperfections
Professional skin retouching in Photoshop removes imperfections by preserving the most important details of a subject. Flyaway hairs cover the beauty of the face and wrinkles distract viewers from the focus point. Retouching handles all blemishes, acne, and others which are essential for portrait photography, fashion photography, and other genres.
Professionalism
Another important factor is adjusting the model’s skin tone. Curves, color balance, and hue/saturation are useful tools for making those changes. For example, curves adjust the brightness and contrast of images. Color balance helps you adjust the overall color balance, and hue/saturation allows you to adjust individual color saturation in the image.
Pro Tip: Retouching ensures quality and visual consistency, whether the images are for personal use, professional portfolios, or commercial purposes.
Enhance visual appeal
You can adjust specific areas to lighten and darken using the dodge and burn tool. Retouching helps photographers, editors, or other businesses enhance an image’s aesthetic or visual appeal.
Highlight details
Retouching highlights details draws attention to subjects, and maintains a natural look. All these are essential for commercial photography, advertising, and other contexts. Also, this photo editing technique contributes to effective branding.
Meet Client Expectations
Clients often have specific expectations regarding commercial photography, advertising campaigns, product catalogs, or others. Here, retouching helps to meet the standards by making subtle or significant improvements without losing image quality. Clients often have specific expectations regarding their appearance in professional photos. Retouching helps meet these expectations by making subtle or tremendous improvements to the skin as requested.
Social media & online presence
Influencers and businesses use retouching to enhance their profiles and create amazing content to grab audiences’ attention. Retouching is creative marketing that allows professional retouchers to create compelling marketing materials and communicate the intended message effectively.
Do you want to give your model portraits a professional outlook? Or are you curious about how to retouch skin and its processes? Scroll down now to learn the easy-to-follow skin retouch processes.
Processes to Professionally Retouch a Photo (Step by Step)
After hiring a talented makeup artist and professional photographer, your portraits might have blemishes that hide the models’ natural beauty. In this situation, high-end skin retouching in Photoshop is a game changer that gives a flawless and natural look.
Healing brush is the most powerful tool that quickly and perfectly retouches images (blending pixels from one area to another). As a versatile tool, you can adjust the size, hardness, mode, source, and sample to the actual result without compromising the image quality.
Here’s how you can quickly do it in Photoshop.
Also read “Adobe Photoshop AI Tools“
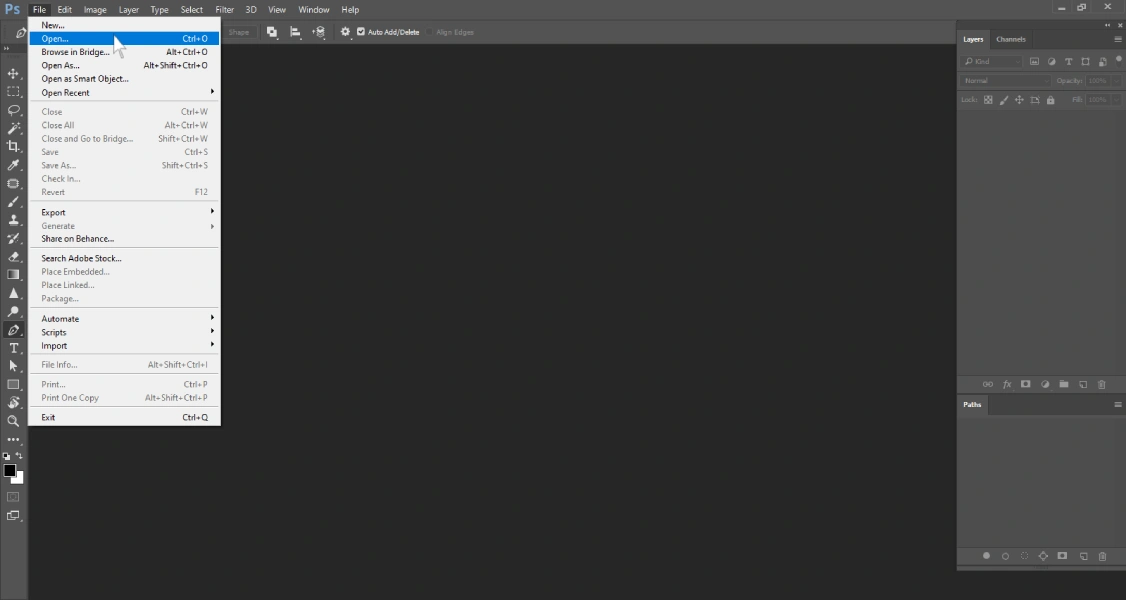
Step 1: Open the image in Photoshop.
First, access Photoshop and open the image for skin retouching actions. You can just drag and drop. You can also open an image from the “Home Screen” by clicking the “Open Button,” then selecting the image and clicking “Open.”
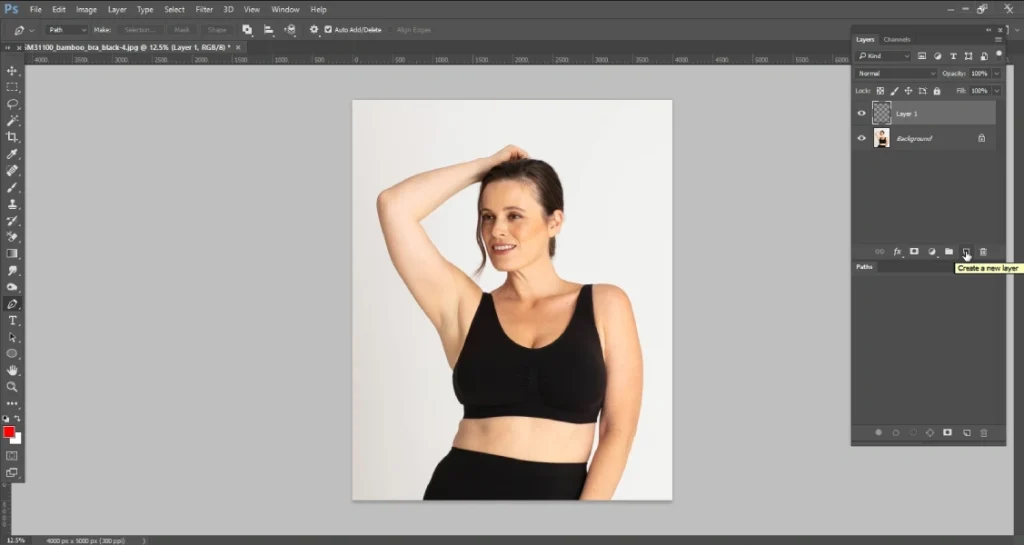
Step 2: Access to a new layer
When working with a healing brush, always work on a new blank layer to avoid altering your image. You can also make changes as usual. To do this, press the “New Layer” button from the Layers palette and rename the layer.
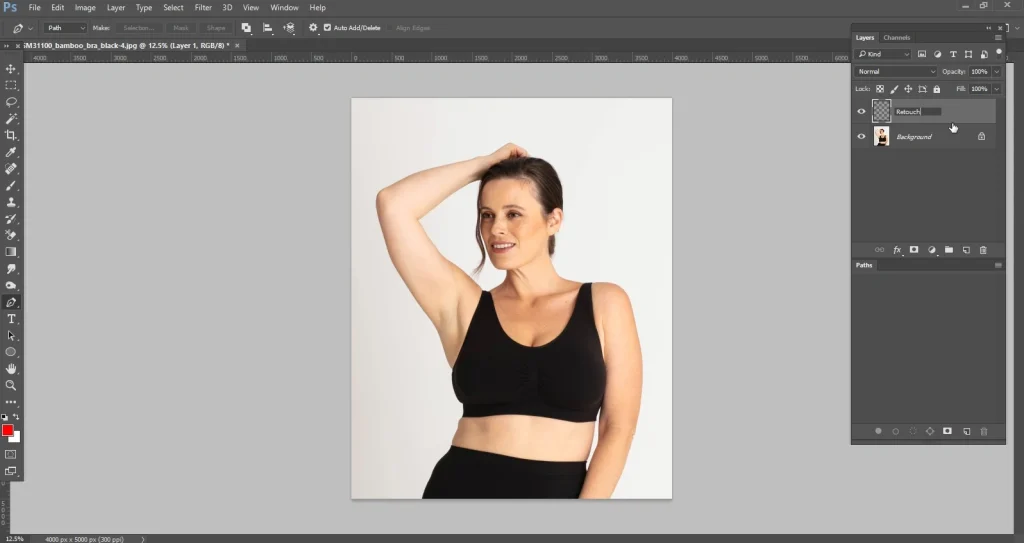
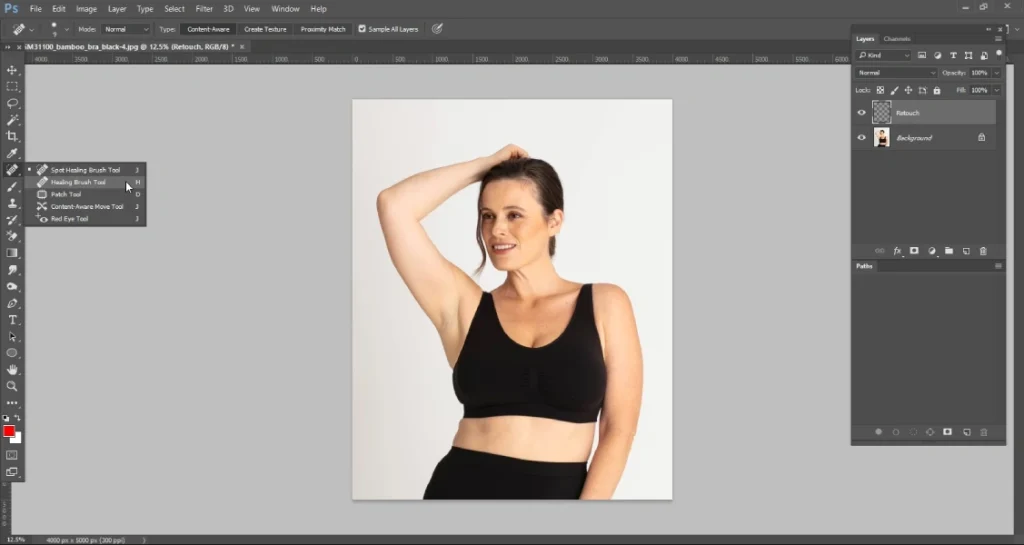
Note: Ensure the dropdown box labeled “sample” is set to Current and Below. You can also adjust Diffusion to (2/3).
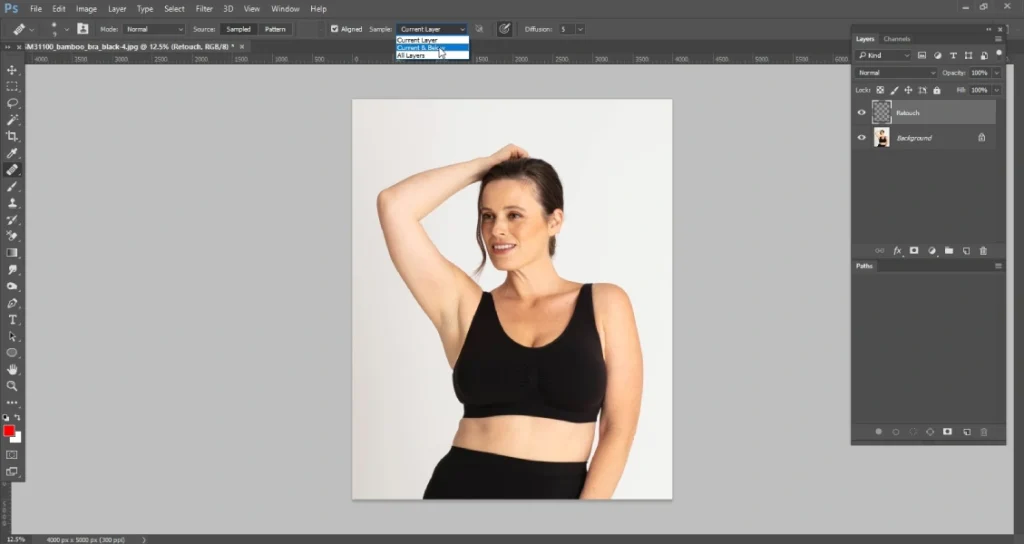
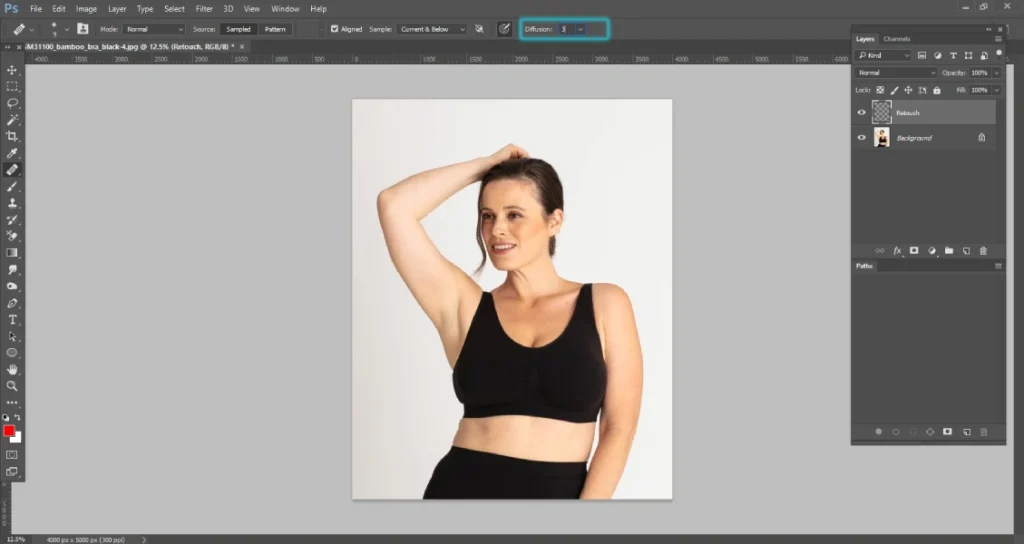
Step 3: Reduce skin blemishes, spots, acne, etc
Go to the toolbar and select the “Healing Brush Tool.” You can resize the brush but try to keep it big enough to cover the blemishes. After removing unwanted skin spots, duplicate this layer and rename it.
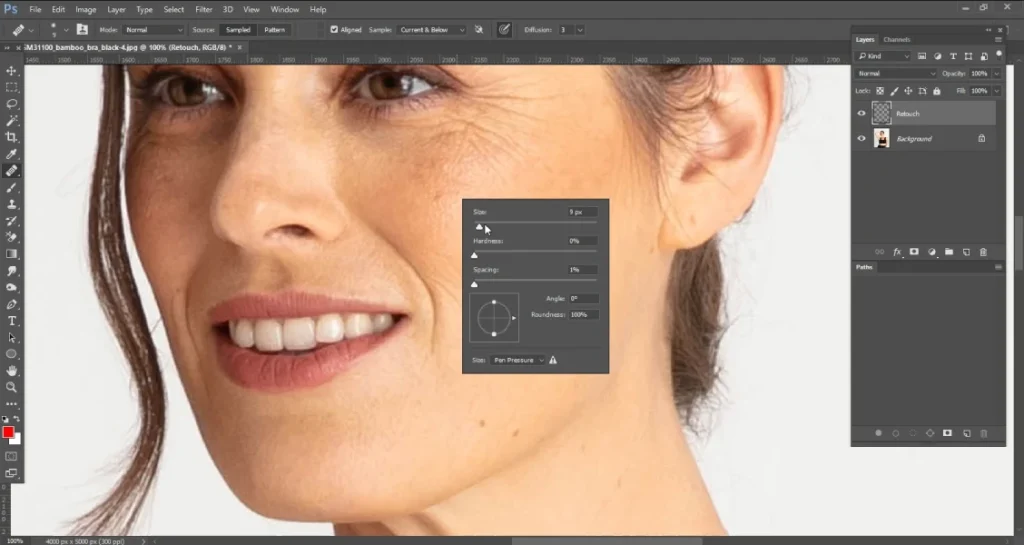
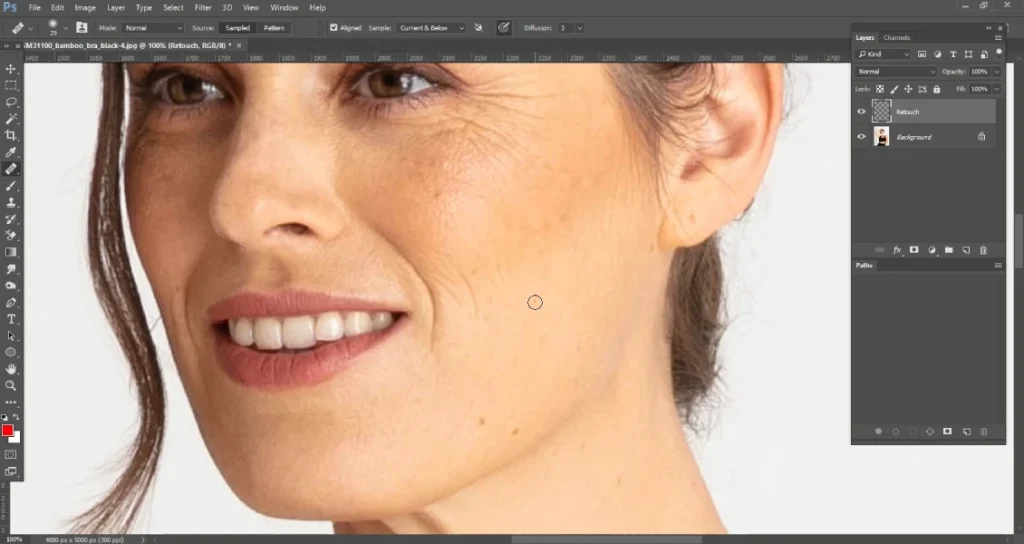
Step 4: Sample when needed
You can make a sample selection whenever needed. The best practice is to do it between every blemish because it improves the images. In the upper section of “Source,” choose the Sampled option. After that, press and hold the alt key to select the sample of the spot-free skin part.
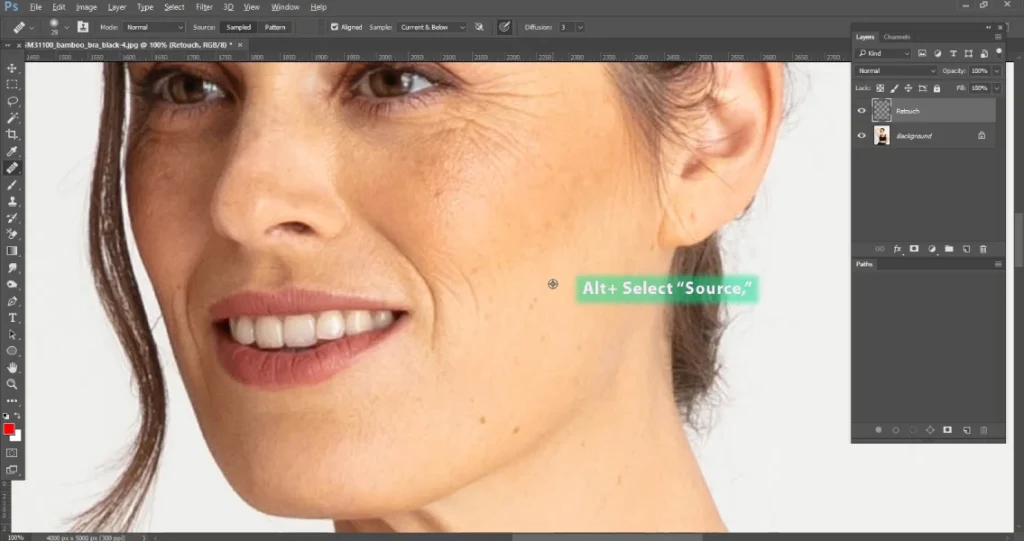
Step 5: Zoom in & out
Don’t zoom in much, as you can lose all the details. At this point, zoom back in so that you can retouch naturally and it doesn’t affect the natural outlook.
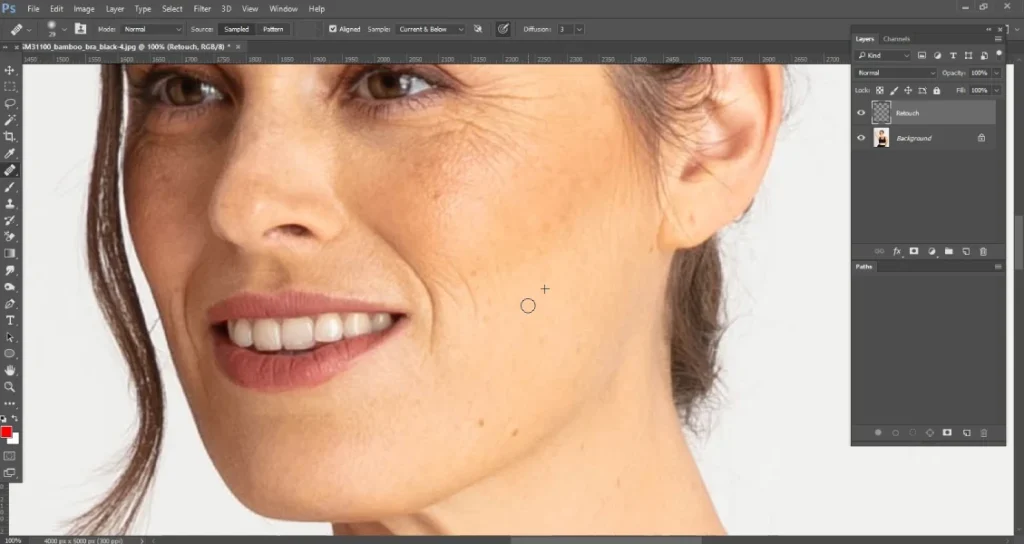
Step 6: Don’t paint
Try to press once or click with a mouse over the spots that you want to remove.
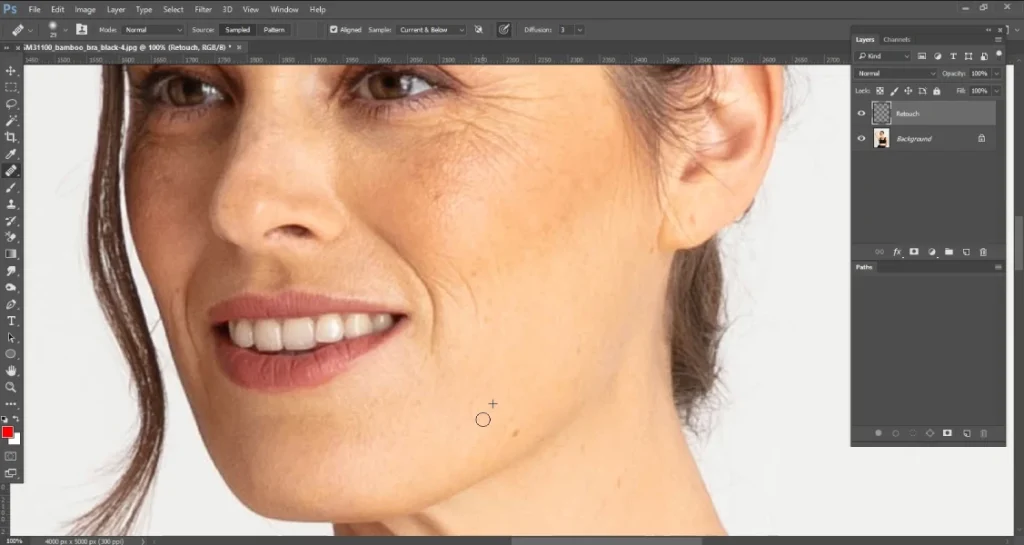
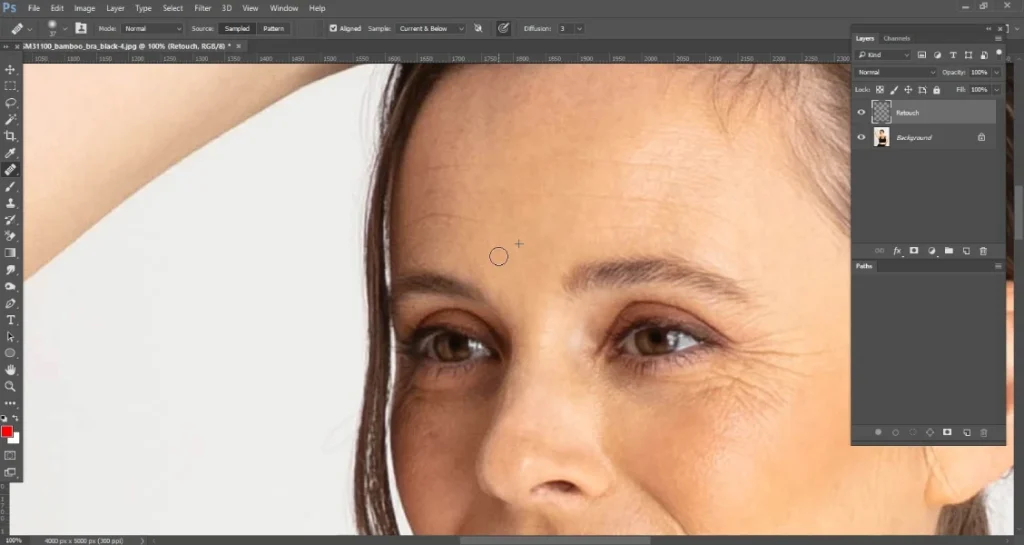
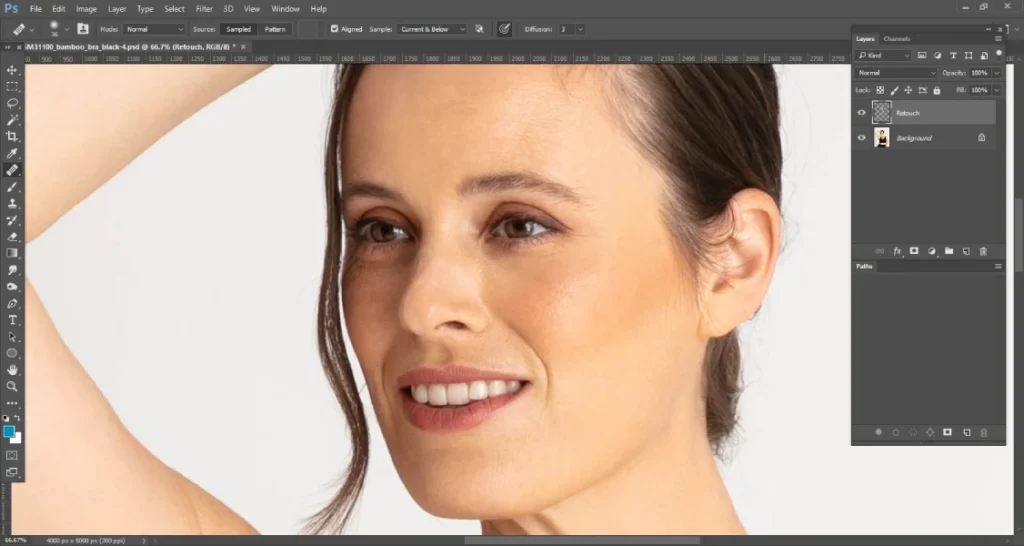
See, the healing brush tool in Photoshop is simple to use and gives professional and polished-looking pieces.
Pro Tip: Check out the video tutorial to do edits flawlessly.
For more details, let’s check out the next section now! Now that you’ve acknowledged how to retouch skin in Photoshop, it’s time to explore best practices of photo editing workflow.
Tips and Best Practices
The purpose of photo retouching or model face skin tone smoothing is not just to recreate the image but rather to enhance overall image quality to achieve the desired realistic look. However, there is no need to fix all imperfections, like birthmarks, because they mislead assumptions.
We’ve compiled a list of Photoshop hacks to improve your professional product photo retouching skills. These tips and tricks are designed to lighten your creative art and enhance the quality of your work.
Best Practices
- Know your tools, software, and file types perfectly so that your work goes smoothly.
- When you use the spot healing or healing method, create a new blank layer to preserve the original image.
- Choose the right resolution to achieve the desired look. For example, if the image is used for print or digital purposes, choose a higher-resolution one.
- Use raw files to unlock the full potential of product images or models and visually represent your creative vision.
- Pay attention to lighting to give a natural and captivating look.
- Use filters and presets wisely to achieve unique and creative visuals.
- Use dodge and burn rather than zoom in too far.
- Try to do minimum retouching on the eyes or iris.
- Be very careful around the under-eye area.
- Take advantage of the clone brush tool to soften the skin tone texture.
Common Mistakes
- Avoid adjusting too much color that results in an unnatural and artificial look.
- Avoid overdoing sharpening because it gives a harsh and artificial look to images.
- Don’t change too many shadows.
- To maintain a natural beauty, avoid removing all freckles, moles, and birthmarks.
- Don’t over-blur, which can make an image hazy or lacking in detail.
- Don’t over-crop, which results in unbalanced or different images from the original.
- Don’t forget details like cracked lips, veins, and facial hair.
- Be aware of retouching techniques like a photograph taken for a magazine requires different retouching from a photograph used on social media platforms.
Frequently Asked questions about retouching Skin in Photoshop
What tools are used to retouch skin in Photoshop?
There are different types of Photoshop face retouching or skin retouching tools, including:
- Healing brush tool: It allows you to smoothen out skin tones, eliminate blemishes, reduce redness or discoloration, and more
- Clone stamp tool: This tool is essential for removing dark circles and under-eye circles and enhancing the skin texture to give it a more polished look.
- Curves or color balance tool: The tool helps deal with hyperpigmentation and discoloration.
- Dodge & burn tool: With this tool, you can enhance facial contours, highlight key features, create a three-dimensional look, and more.
Apart from these, there are also patch tools, blur tools, and many others.
What is high-end retouching?
The high-end retouching involves professional-level and advanced Photoshop photo editing workflows to refine and enhance images to their best. The technique is often used in fashion, beauty, advertising, and editorial photography, where perfection matters most. Meanwhile, high-end skin retouching in Photoshop indicates to –
- Skin’s texture improvement,
- Removing imperfections like blemishes, under-eye circles, skin tone, and more.
Why do we retouch the skin?
Smooth skin retouching on Photoshop serves several purposes including aesthetic, commercial considerations, professional headshots, and more. Here, we’ve highlighted the main reasons behind skin retouched below:
- For personal photography or model portfolios, retouched skin is associated with perfection that enhances confidence by presenting the subject in the best possible light.
- Retouching skin creates a particular mood, style, or effect to achieve a specific artistic vision.
- In professional arenas, retouching is used to maintain consistency across a series of images and ensures the overall quality and appearance.
Conclusion
When it comes to skin retouching, this photo editing technique transforms photos into amazing art. With this, you can successfully attract audiences and give models a stunning look.
Marketing and advertising, artistic expression, special occasions, corporate headshots, or others – whatever your business purpose the key thing is to balance between maintaining the subject’s natural appearance and improving image quality.
It’s time to give wings to your creative thoughts!


