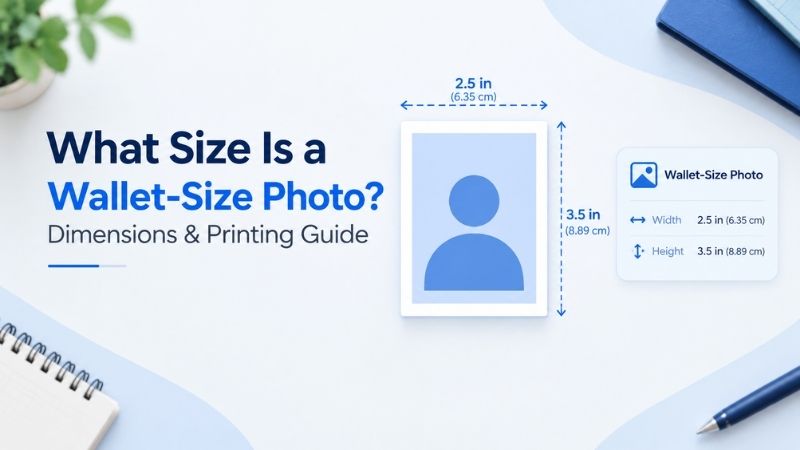

A wallet-size photo is usually 2.5 × 3.5 inches (6.35 × 8.89 cm), though some photo labs sell a smaller 2 × 3-inch print under the same name. Check the dimensions carefully before you order. Many customers choose “wallet” at checkout, then wonder why the finished photo doesn’t fit the sleeve they bought for it.
The other thing to watch is the crop. A phone photo may be sharp enough to print, but its shape often differs from a wallet print. Here’s how to check the size, pixels, and crop before you hit Print.
Table of Contents
ToggleWhat Size Is a Wallet Size Photo?
A standard wallet-size photo measures 2.5 × 3.5 inches (6.35 × 8.89 cm). You’ll also see 2 × 3-inch (5.08 × 7.62 cm) prints sold as wallet photos. Always check the dimensions on the order page, especially if the print needs to fit a sleeve or frame.
| Print sold as | Inches | Centimeters | Pixels at 300 PPI | Aspect Ratio |
|---|---|---|---|---|
Standard wallet | 2.5 × 3.5 | 6.35 × 8.89 | 750 × 1,050 | 5:7 |
Small wallet | 2 × 3 | 5.08 × 7.62 | 600 × 900 | 2:3 |
The pixel figures are useful targets for a sharp print. PPI means pixels per inch: at 300 PPI, a 2.5-inch-wide print needs 750 pixels across. A larger file is fine. The lab can scale it down.
But why exactly does the size vary so much, you might wonder. Here’s why:
“Wallet size” describes how a print is used, but it isn’t one fixed size across every photo lab. School portrait packages often use the 2.5 × 3.5-inch format, while a lab or home-printing template may label a smaller 2 × 3-inch print as a wallet.
That half-inch difference changes the crop, too. A 2 × 3 print has a 2:3 aspect ratio, the same shape as a 4 × 6 print. A 2.5 × 3.5 wallet has a 5:7 ratio. If you switch between them without checking the preview, the lab may trim part of the image. Keep faces and other details away from the edges, then inspect the final crop before placing the order.
What Size Is a Wallet Size Picture in Inches, CM & Pixels?
A standard wallet-size picture is 2.5 × 3.5 inches, or 6.35 × 8.89 cm. For a sharp print at 300 PPI, prepare an image that’s at least 750 × 1,050 pixels. If your lab offers the smaller 2 × 3-inch wallet, the matching figures are 5.08 × 7.62 cm and 600 × 900 pixels. Here is more elaboration on the size measurements of wallet-size pictures:
Wallet Photo Size in Inches
The usual wallet photo dimensions are 2.5 inches wide by 3.5 inches tall for a vertical portrait. For a horizontal photo, turn it sideways; the dimensions become 3.5 × 2.5 inches. Some labs offer a smaller 2 × 3-inch version, so use the measurements in the print listing when you set up your crop.
Wallet Photo Size in CM
A 2.5 × 3.5-inch wallet photo measures 6.35 × 8.89 cm. A 2 × 3-inch photo measures 5.08 × 7.62 cm. Those are exact conversions because one inch equals 2.54 cm. You may see a shop round the first size to 6.4 × 8.9 cm on its menu; check the listed inch size if you need the print to fit a particular opening.
Wallet Photo Size in Pixels
For a standard wallet photo, aim for 750 × 1,050 pixels at 300 PPI. For the smaller 2 × 3-inch print, aim for 600 × 900 pixels. Multiply each side in inches by 300 to get the target pixel count.
Check the pixels in the cropped image, since cropping removes some of the original photo. And don’t worry if your file has more pixels than the target. That gives you room to adjust the crop while keeping the print sharp.
Is Wallet Size Photo 2×3 or 2.5×3.5?
Both are wallet photo sizes. The 2.5 × 3.5-inch print is commonly listed as a standard wallet, while other services sell 2 × 3-inch wallets. For example, brands like Mpix and Nations Photo Lab list 2.5 × 3.5-inch wallets; Walgreens lists 2 × 3-inch wallet prints. Even school portrait providers vary.
Standard wallet photo: 2.5 × 3.5 inches
Choose this size when your order or photo holder specifies 2.5 × 3.5 inches. Its aspect ratio is 5:7, meaning the short side and long side keep the same proportions as a 5×7 print. At 300 PPI, a file cropped to 750 × 1,050 pixels has the right dimensions for this print.
Check the finished size if you need an exact fit. Some wallet products include a white border or rounded corners, so the visible image and the outer edge may differ.
Small wallet photo: 2 × 3 inches
Choose 2 × 3 inches when the lab lists that size or your holder calls for it. This print has a 2:3 aspect ratio, exactly the same proportions as a 4×6 print. You can scale a properly cropped 4 × 6 image down to 2 × 3 without changing what appears in the frame. For a 300 PPI print, aim for 600 × 900 pixels after cropping.
Which size should you order?
Start with the dimensions of the sleeve, frame opening, or album pocket. Then match those numbers to the lab’s product listing. If you’re ordering prints to hand out, either size works; choose the one you prefer and review the crop before checkout.
A 5:7 crop and a 2:3 crop show slightly different parts of the photo. On a close portrait, that can mean losing a bit of hair or shoulder at the edge. Give the face some breathing room in the preview. It’s a quick check that saves a disappointing batch of prints.
What Is a Wallet Size Photo Used For?
Wallet-size photos are small prints made for sharing, carrying, and tucking into places where a 4 × 6 would feel too large. Photo labs offer them for portraits, and the compact size works well in scrapbooks and albums.
- Family photos: Print copies of a favorite portrait for relatives. Check the crop if several people are close to the edges.
- School portraits: Wallet prints are a familiar choice for handing out a student’s picture. Check the school’s listed dimensions, since its “wallet” may be 2 × 3 or 2.5 × 3.5 inches.
- Graduation photos: Share a cap-and-gown portrait with friends and family without ordering a full-size print for everyone.
- Keepsake pictures: Slip a photo into a wallet, card, or memory box. Measure a fitted holder first.
- Photo albums: Use them in small pockets or scrapbook layouts where a larger print would cover too much of the page.
- Small portrait prints: Keep a headshot or a favorite pet portrait close at hand. Leave a little space around the subject so trimming doesn’t clip a face or ears.
For any of these, order by the actual measurements, especially when the photo must fit a pocket or opening. “Wallet size” alone won’t tell you which version the lab will send.
Wallet Size Photo vs Passport Photo: What Is the Difference?
A wallet photo is a small print for sharing or keeping. A passport photo is an identity photo made to a specific country’s application rules. You cannot use a wallet print for a passport simply because the two look close in size. Here’re the core differences between them:
| Detail | Wallet Size Photo | Passport Photo |
|---|---|---|
Typical print size | 2.5 × 3.5 inches, or 2 × 3 inches at some labs | Depends on the country: 2 × 2 inches for a U.S. passport; 35 × 45 mm for a UK passport |
Shape | Rectangular, either 5:7 or 2:3 | Square for a U.S. passport; rectangular for a UK passport |
Cropping | You can choose a close-up or leave more of the scene | Face position and head size must meet the application rules |
Background and pose | Your choice | Must follow the issuing authority’s requirements |
The size difference is easy to miss. A 2 × 3-inch wallet photo is two inches wide, like a U.S. passport photo, but an inch taller. Cutting it into a square may still leave your head the wrong size or in the wrong position. The U.S. Department of State requires a 2 × 2-inch (51 × 51 mm) photo with the head centered and sized within its stated limits.
There is no universal “passport size,” either. The UK requires printed passport photos to measure 35 mm wide by 45 mm high. That is smaller than either wallet print discussed here.
If the photo is for an application, start with the official photo instructions for that passport. Tell the print lab which country it is for and check the final print against those requirements. If it is for an album or to give to someone, order the wallet size you like.
How to Resize a Photo to Wallet Size
To make a wallet-size photo, crop it to the print’s shape first, then check that the cropped image has enough pixels. Resizing the width and height separately can stretch a face; changing a file’s PPI label alone cannot add detail. So, be meticulous when resizing the photo. Here’s a short step-by-step guide:
- Confirm the size you’re ordering. Use a 5:7 crop for a 2.5 × 3.5-inch wallet or a 2:3 crop for a 2 × 3-inch wallet. Most photo editors let you enter a custom crop ratio.
- Position the crop around the subject. Move the crop box until the face sits comfortably inside it. Check hair, shoulders, and anyone near the edge. If your photo has a different shape, the lab may crop it automatically, sometimes from the center rather than where you would choose.
- Check the cropped file’s pixel dimensions. At 300 PPI, aim for at least 750 × 1,050 pixels for a 2.5 × 3.5 wallet or 600 × 900 pixels for a 2 × 3 wallet. Those numbers come from multiplying each print dimension by 300. A larger image is fine; leave its extra pixels in place.
- Export a copy and inspect the order preview. Keep the original photo untouched. Upload the cropped copy, choose the matching print size, and make sure the preview still shows everything you intended. Photo labs warn that a mismatch between the file’s shape and the selected print size can cause another crop.
If the crop falls short of those pixel targets, try starting again from the original camera file instead of a screenshot or a photo downloaded from a message. And if an editor offers to “increase resolution,” check whether it is adding pixels through resampling. A new 300 PPI label by itself does not make a soft image sharp.
How to Print Wallet Size Photos at Home
You can print wallet-size photos at home with a photo printer, photo paper, and a layout set to the finished size you want: 2.5 × 3.5 or 2 × 3 inches. The setting to watch is print scaling. A file cropped correctly on screen can still come out the wrong size if the print dialog enlarges it to fill the page. Here’s a short guide on how you can print the wallet size photo at home:
- Start with the cropped photo. Use a 5:7 crop for a 2.5 × 3.5-inch wallet or a 2:3 crop for a 2 × 3-inch wallet. Check the face and edges one last time. At 300 PPI, the respective pixel targets are 750 × 1,050 and 600 × 900.
- Set up a page at its real paper size. Choose the 4 × 6 photo paper or letter-size sheet you will load into the printer. Place the photo on that page at its actual finished dimensions. If you want several copies, duplicate the photo in the layout and leave room between them for cutting. Keep the proportions locked so the picture does not stretch.
- Choose the right paper settings. In the printer dialog, match the paper size and paper type to what you loaded, then select a photo-quality print setting. If your paper has a printable side, load it as your printer’s instructions show.
- Check scaling before you print. Look for a setting such as Actual Size or 100%. Turn off “Fit to Page” if it changes the size of your prepared layout. Check the preview: each wallet image should still measure 2.5 × 3.5 or 2 × 3 inches on the page.
- Print one test sheet and measure it. Use a ruler on the printed image, not the full sheet. If the image is too large or small, fix the layout or scaling setting before printing more copies. Once the size is right, cut along the wallet edges with a paper trimmer or a ruler and craft knife.
One more crop trap: borderless printing can enlarge an image slightly so ink reaches the paper’s edges. That may trim details you could see in the preview. Canon and Epson both describe this behavior in their printer guidance. If you’re cutting wallets from a larger sheet, leave a small white margin around each photo and avoid placing faces or text tight against the edge. |
How Many Wallet Size Photos Fit on a 4×6 Print?
A 4 × 6-inch sheet fits four 2 × 3-inch photos or two 2.5 × 3.5-inch photos at their full stated sizes. The catch is the cutting space because four 2 × 3 prints fill the sheet edge to edge, leaving no white gap between them.
- Fit 4 of the 2 x 3 inches by placing two of them across and two down with no space.
- To fit 2 of the 2.5 x 3.5 inches, place them side by side, with space around the pair.
For 2 × 3 wallets, divide the 4-inch side into two 2-inch widths and the 6-inch side into two 3-inch lengths. The math is tidy, but the trimming is fussier. A printer that cannot print to the paper’s edge may shrink the layout or leave part of it unprinted. Borderless mode can solve the white-edge problem, but some printers enlarge the image slightly in that mode and crop the outer edges.
For 2.5 × 3.5 wallets, put the two 2.5-inch sides along the 6-inch length. Together they use 5 inches, while the 3.5-inch sides fit within the 4-inch width. That leaves room for a gap between the photos and clean trimming.
If you’re ordering from a lab, check its product preview instead of assuming its “set of four” comes from a single 4 × 6 sheet. Labs use different wallet sizes and sheet layouts. Walgreens, for example, sells a sheet of four 2 × 3-inch images, while Mpix sells sets of four 2.5 × 3.5-inch wallets.
Frequently Asked Questions (FAQ)
What size is a wallet Size photo?
A standard wallet-size photo is 2.5 × 3.5 inches (6.35 × 8.89 cm). Some labs sell 2 × 3-inch (5.08 × 7.62 cm) wallet prints instead. Check the measurements on the order page if the print needs to fit a holder.
What is a wallet-size photo in pixels?
At 300 PPI, a 2.5 × 3.5-inch wallet photo needs 750 × 1,050 pixels. A 2 × 3-inch wallet needs 600 × 900 pixels. Check those dimensions after cropping, since the crop removes pixels.
Is wallet size the same as passport size?
No. Wallet prints come in 2.5 × 3.5-inch and 2 × 3-inch sizes, while a printed U.S. passport photo must be 2 × 2 inches and meet head-size and placement rules. Passport requirements vary by country, so follow the instructions for the application you’re submitting.
Can I print wallet-size photos at home?
Yes. Crop the image to the wallet size you want, place it at 2.5 × 3.5 or 2 × 3 inches in a print layout, and print at Actual Size (100%) on photo paper. Print one test sheet, measure the images, and check the edges before making more copies.
Conclusion
The size to remember is 2.5 × 3.5 inches, with 2 × 3 inches as a common smaller wallet option. Match the crop to the size, check the pixels after cropping, and confirm the lab’s measurements or your home printer’s actual output. Those quick checks keep a small print from coming back with the wrong fit or a clipped face.