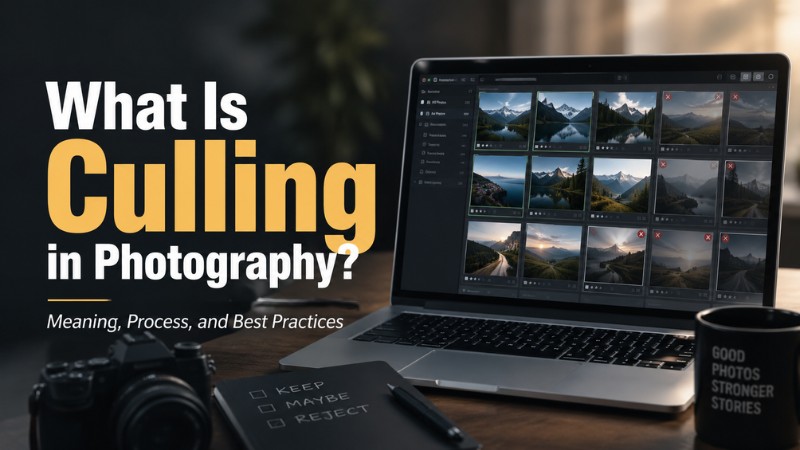

A single photography session can leave you with thousands of RAW files and no obvious place to begin. This is where culling is your savior. Culling in photography is the process of reviewing those images and deciding which ones are worth keeping while removing blurry, duplicated, poorly timed, or otherwise unusable shots.
Culling happens before detailed editing. It helps you focus your time on photographs that have real value instead of adjusting every frame from the shoot. The choices you make here also shape the gallery your client receives. But as good as it sounds, the process is quite tedious and time-consuming, and any sort of carelessness can leave you with unwanted images.
So this guide explains what culling means, why it matters, how the process works, what makes an image worth keeping, and how many photos to deliver. It also covers manual and AI-assisted culling, common mistakes, and the different standards used for wedding, event, eCommerce, and fashion photography.
Table of Contents
ToggleWhat Is Culling in Photography?
Culling in photography is the process of reviewing a large batch of images and selecting the best files to keep while removing weak, repeated, or unusable shots. It is the filtering stage that happens before detailed photo editing begins.
The word culling comes from the practice of culling a herd, in which weaker animals are separated from the stronger animals. In photography, the idea is similar:
- You review every frame and remove images with missed focus, closed eyes, motion blur, poor timing, awkward expressions, or other technical problems.
- You also remove unnecessary duplicates when several frames capture almost the same moment. But a professional cull does not mean keeping only technically perfect images. A slightly imperfect frame may still deserve a place if it captures a genuine reaction, an important moment, or a stronger story than the sharper image beside it.
That is why culling requires both technical judgment and visual judgment. You are deciding which photographs deserve editing time and which ones do not.
Photographers commonly cull RAW files using tools such as Photo Mechanic, Lightroom, Aftershoot, FilterPixel, or Narrative Select. The software may change, but the purpose stays the same: reduce a large shoot to a focused set of usable photographs.
Culling applies to almost every genre. Wedding and event photographers use it to sort thousands of candid moments. Product, eCommerce, fashion, portrait, real estate, and sports photographers also cull before preparing their final images.
Why Is Culling Important in Photography?
Culling is important because it saves time, conserves storage space, and helps you deliver a stronger, more focused collection of images.
- It saves editing time. Editing every frame from a large shoot wastes hours on photos that will never be delivered. Culling removes the obvious misses first, so you can spend your editing time on images that have a real chance of being used.
- It creates a cleaner client gallery. Clients do not need to scroll through five nearly identical photos or images with closed eyes and missed focus. A well-culled gallery feels easier to view and shows your work with more confidence.
- It protects your creative standard. The images you show represent your judgment as a photographer. Keeping weak or repetitive frames can make a strong shoot feel less polished.
- It reduces storage pressure. RAW files take up significant space. Removing unwanted images helps keep your working drives, backups, and online storage more manageable.
- It helps you find the strongest story. A shoot may contain many similar moments, but only a few truly communicate the emotion or purpose of the session. Culling helps those stronger images stand out.
- It keeps the workflow organized. Once the rejected and selected files are separated, editing, exporting, reviewing, and delivering become much easier to manage.
Culling vs Editing: What’s the Difference?
Culling and editing are two different stages of the photography workflow. Culling decides which photographs are worth keeping, while editing improves the photographs you have selected. Let’s talk more about Culling vs Editing and learn all the differences between them.
Culling
Culling is the selection stage. You review the complete shoot and remove images with missed focus, closed eyes, motion blur, awkward expressions, poor timing, or unnecessary repetition.
You compare similar frames and choose the strongest one. You may also keep a few alternatives when they show different emotions, poses, or useful details.
The main question during culling is: Should this image move forward in the workflow?
Editing
Editing begins after the images have been selected. This is where you adjust exposure, color, contrast, cropping, shadows, and other visual details.
Depending on the project, editing may also include skin cleanup, background removal, object cleanup, color matching, or detailed product retouching. The goal is to prepare the chosen photographs for a client gallery, a website, a print, an advertisement, or a social media post.
The main question during editing is: How can this selected image look its best while still matching the project’s purpose?
One simple way to remember the difference is to compare photography to cooking. Culling is choosing the best ingredients. Editing is preparing those ingredients into the finished meal. Editing every image before culling would be like cooking everything you bought before deciding what belongs on the plate.
Some culling programs, including Lightroom and AI-assisted tools, may provide previews or basic image adjustments. That can make selection easier, but it does not turn culling into complete editing.
In short, culling controls which images you work on. Editing controls how those images look when finished.
You may find both of them overwhelming when you are dealing with hundreds of photos. To ensure you cull the best photos of your sweet memories and edit them exactly as you envision, leave it to a photo editing agency like Graphic Aid.
With their expert photo editing services, you can be at ease. Their team handles tasks such as portrait retouching, color correction, product cleanup, and other detailed post-production work, allowing you to focus on shooting and client delivery.
Note: Read more to learn about - "What Is Photo Editing?"
The Photo Culling Process: Step by Step
The photo culling process usually involves several focused passes through the shoot. Each pass has a clear purpose, so you do not have to make every decision at once.
1. Import and back up the files
Transfer the photos from your memory cards to a clearly named folder. Before rejecting or deleting anything, create a second copy on another drive or cloud storage.
You can import the files directly into Lightroom or use Photo Mechanic when you need faster RAW previews. Keep the original filenames during this stage so files remain easy to track.
2. Complete a fast first pass
Move through the shoot quickly and reject only the obvious failures. These may include completely blurred photos, accidental shutter clicks, test frames, severe exposure problems, closed eyes, and moments where the subject is clearly not ready.
Do not compare similar images yet. The goal is simply to clear away files that have no realistic chance of being delivered.
3. Compare duplicates and burst shots
The second pass requires more attention. Place similar images side by side and compare focus, expression, body position, composition, and timing.
For burst shots, zoom in on the main subject’s face and choose the frame with the sharpest eyes and most natural expression. Keep another frame only when it offers a useful difference, such as a new reaction or pose.
4. Apply a consistent rating system
Use flags, color labels, or star ratings to separate your files. For example, a pick flag can mark selected images, one star can identify uncertain files, and a reject flag can mark photos you will not use.
Choose one system and use it across every shoot. Lightroom, Photo Mechanic, and most culling programs support these labels, making it easy to filter each group later.
5. Run a technical check
Now inspect the selected images more closely. Zoom in to confirm that the main subject is sharp, especially around the eyes. Check exposure, framing, motion blur, unwanted objects, and whether important parts of the subject have been cut off.
Technical quality matters, but context still counts. A meaningful candid moment may be worth keeping even when it is slightly softer than a posed photograph.
6. Review the final selection
Filter the folder to show only your selected images. Review them in order and look for missing moments, repeated poses, inconsistent product angles, or too many photos from one part of the shoot.
Move uncertain images into a separate “maybe” group instead of deleting them immediately. Once the final collection feels complete and balanced, send the selected files into the editing stage.
Culling Criteria: What to Look For
A photo should be kept when it is technically usable, adds value to the final collection, and represents the strongest version of that moment. A sharp image can still be rejected if it feels repetitive, while a slightly imperfect image may stay if the emotion or timing cannot be repeated.
Technical criteria
- Focus: Check whether the main subject is sharp, especially the eyes in portraits. Reject images where missed focus makes the subject look unintentionally soft.
- Exposure: Keep files with recoverable highlights and shadows. Reject frames in which important details are lost due to severe overexposure or underexposure.
- Motion blur: Decide whether the blur looks intentional. Unplanned camera shake or subject movement usually makes an image unusable.
- Framing and composition: Look for distracting objects, awkward crops, tilted lines, or important body parts cut off at uncomfortable points.
- Closed eyes and expressions: Check every visible face, especially in group photographs. One blink or awkward expression can weaken an otherwise strong frame.
Creative and storytelling criteria
- Emotion: Keep photographs that capture genuine reactions, connection, movement, or personality. These moments often matter more than small technical imperfections.
- Timing: Choose the frame that captures the peak of the action, such as a kiss, a laugh, a jump, or a product interaction.
- Variety: The final selection should include a useful mix of wide shots, medium views, close-ups, details, and key moments. Avoid delivering the same pose repeatedly.
- Story value: Each selected image should add information, feeling, or context. If removing a photo doesn’t change the final collection, it may not need to stay.
- Client purpose: Judge the image according to how it will be used. A wedding client may value emotion, while a commercial client may care more about clean presentation and brand accuracy.
For product and eCommerce photography, consistency carries more weight. Selected images should have matching angles, lighting, backgrounds, scale, product position, and color. A good product photo can still be rejected if it breaks the visual pattern of the rest of the catalog.
How Many Photos Should You Keep?
There is no fixed number of photos to keep. The right amount depends on the genre of photography, shoot length, the number of meaningful moments, and the client’s expectations.
As a practical guide:
- Wedding photography: Keep around 10–15% of the total frames for the final gallery. A shoot with 3,000–5,000 images may produce roughly 400–600 delivered photos.
- Event photography: Keep around 15–25%, since events often require broader coverage and more guest interactions.
- Portrait sessions: Keep only the strongest expressions and poses, often around 10–20% of the total shots.
- Product and eCommerce photography: Keep the frames that meet the required standards for angle, lighting, focus, and consistency. The percentage matters less than having complete, matching coverage.
Keeping too many images creates a repetitive and tiring gallery. Keeping too few may miss important moments and leave the client feeling shortchanged.
The best rule is simple: keep every image that adds something useful, and remove every image that does not. A smaller, well-chosen collection usually feels stronger than a large folder filled with near-duplicates.
Manual Culling vs. AI-Assisted Culling
What is Manual Photo Culling?
Manual photo culling is the process of reviewing and selecting images by hand, using your own visual judgment. The photographer or editor opens the files, compares similar frames, checks technical quality, and marks the photographs they want to keep.
In a manual workflow, you decide whether an image has the right focus, expression, timing, composition, and emotional value. You can understand details that software may miss, such as a quiet reaction, a meaningful glance, or the strongest moment in a sequence.
The main advantage is full creative control. You decide what matters for the client and the story. The downside is time. Reviewing thousands of images frame by frame can take several hours, especially for weddings, events, and high-volume commercial shoots.
Manual culling works well when the shoot has a strong personal style or when emotional judgment matters more than speed. It is also useful when the images are unusual and automated tools may struggle to understand the photographer’s intention.
What is AI Photo Culling?
AI photo culling uses software to analyze images and help identify the files most likely to be usable. These programs can examine focus, blur, face visibility, eye openness, exposure, and similarities between images.
Tools such as Aftershoot, FilterPixel, and Narrative Select can group burst sequences, identify possible duplicates, and separate likely rejects from stronger candidates. They do not simply understand the complete story of a shoot. Instead, they use image patterns and technical signals to reduce the number of files that need close human review.
The biggest advantage is speed. AI can handle the obvious first-pass decisions quickly, which is useful when a photographer has a large shoot and a short deadline. It can also apply the same basic checks across the entire folder.
AI culling still needs human review. Software may rank a technically sharp image highly even when the expression feels weak, or reject a slightly soft photograph that captures an important moment. The strongest workflow often uses AI for sorting and a photographer or editor for the final judgment.
Manual vs AI Photo Culling: A Quick Comparison
| Factor | Manual Culling | AI-Assisted Culling |
|---|---|---|
Speed | Slower because every decision is made by a person | Faster for large batches and obvious rejects |
Cost | Requires more personal or editor hours | Usually requires software payment but saves labor time |
Creative judgment | Strong understanding of emotion, story, and client style | Limited understanding of meaning and personal preference |
Consistency | Can change when the editor is tired or rushed | Applies the same technical checks across the folder |
Learning curve | Requires practice and visual experience | Requires learning the software and reviewing its results |
Best use case | Smaller shoots, personal style, and emotion-led work | Large shoots, tight deadlines, and first-pass sorting |
Common Culling Mistakes to Avoid
Culling mistakes usually happen when the process becomes rushed, emotional, or inconsistent. These are the problems that most often weaken a final gallery. Now let’s know more about those mistakes and how you can actually avoid them.
Culling immediately after a long shoot
After spending hours photographing, your eyes and judgment are already tired. You may reject a meaningful image too quickly or keep weak frames simply because you want to finish.
Take a break before culling, especially after a wedding or event. A rested review makes it easier to notice focus problems, repeated images, and stronger moments.
Keeping too many “maybe” photos
Indecision often leads to a folder full of nearly identical images. Keeping every possible option does not add more value to the client. It creates a repetitive gallery and adds unnecessary editing work.
When two photographs show the same moment, compare them carefully and keep the stronger frame. Move uncertain images into a temporary “maybe” folder, then review them again after the main selection.
Changing your rating system halfway through
Using flags for one part of the shoot, stars for another, and random labels later makes the folder difficult to manage. You may lose track of which files are selected, rejected, or still waiting for review.
Choose a simple system before you begin and use it for the complete shoot. Consistency makes filtering and editing much faster.
Choosing technical quality over meaning every time
Sharpness matters, but it is not the only reason to keep a photograph. A slightly soft image may capture a unique reaction or important moment that cannot be recreated.
Judge technical quality alongside emotion, timing, and story value.
Deleting originals too early
Never delete rejected files before the final gallery has been reviewed and approved. A client may request an image you initially marked as a reject, or you may discover that a selected file has an editing problem.
Keep the original RAW files and rejected images safely backed up until the project is complete. Sentinel-leaning “Photographs,” etc. Good.
Culling for eCommerce and Fashion Photography
Culling for eCommerce and fashion photography focuses more on consistency, accuracy, and usability than on emotional storytelling. The selected images must present products or clothing clearly and maintain a consistent visual standard across the complete set.
→ For eCommerce photography, check whether the product is sharp, centered, correctly framed, and free from distracting flaws. Compare images for matching camera angles, lighting, background, scale, and product position. If one image is brighter, darker, or framed differently from the rest of the catalog, it may need to be rejected even if it looks good on its own.
Completeness also matters. A product may require front, back, side, close-up, detail, or lifestyle views. Culling should make sure every required angle is covered without adding unnecessary duplicates.
→ Fashion photography requires a different type of comparison. Review the model’s expression, pose, garment position, hand placement, hair, and fabric movement. Select frames in which the clothing fits properly and the model looks natural. Remove images with awkward posture, closed eyes, distracting folds, or inconsistent styling.
Fashion shoots often produce many similar frames in a short time, so comparing images side by side helps you choose the strongest pose and expression.
Turnaround speed matters in both fields. eCommerce brands may need hundreds of images for a product launch, while fashion teams often work with tight campaign deadlines. A clear rating system, consistent file naming, and quick first-pass culling help the selected images move to editing without unnecessary delay.
Best Practices for a More Efficient Culling Workflow
An efficient culling workflow depends on a repeatable system, focused decisions, and safe file handling. These practices help you work faster without lowering the quality of your final selection.
Use keyboard shortcuts
Keyboard shortcuts let you move through images and mark them without reaching for the mouse after every frame. Learn the basic shortcuts for rating, flagging, rejecting, zooming, and moving to the next image in your chosen software.
This small change saves time across a large shoot and keeps your attention on the photographs instead of the interface.
Work in short, focused passes
Avoid trying to finish a large shoot in one long session. Start with a quick pass to catch obvious failures, take a short break, then return for detailed comparisons and technical checks.
Short sessions help you maintain consistent judgment. They also make it easier to notice small differences between similar frames.
Back up originals before rejecting files
Create at least one additional copy of the original files before you begin deleting or permanently rejecting anything. Keep the backup until the client has approved the final gallery and the project is fully delivered.
This protects you from accidental deletion and gives you a way to recover an image if a client later requests it.
Use the same rating system every time
Choose simple systems: pick flags for selected images, reject flags for unusable files, and a separate label for uncertain images. Use the same system for every project.
When the method becomes familiar, you spend less time deciding how to organize the shoot and more time judging the photographs themselves.
Let AI handle the obvious first pass
AI culling tools can help identify blur, closed eyes, duplicates, and other technical problems in a large folder. Let the software reduce the workload, but review its suggestions before making final decisions.
Human judgment is still needed for emotion, storytelling, client preferences, and images that are meaningful despite minor imperfections.
Frequently Asked Questions
What is culling in photography?
Culling in photography is the process of reviewing a large group of images and selecting the strongest files to keep. It also involves removing blurry, repeated, poorly timed, or unusable photographs before editing begins.
Is culling the same as editing?
No. Culling is about choosing which images move forward, while editing is about adjusting the selected images. Culling comes first, followed by color correction, retouching, cropping, and other finishing work.
Can AI replace manual culling?
AI can reduce much of the repetitive work, but it cannot fully replace manual judgment. It can identify blur, closed eyes, duplicates, and focus problems, while a human still needs to judge emotion, story, timing, and client preferences.
What is the best software for culling photos?
There is no single best option for every photographer. Photo Mechanic and Lightroom work well for manual workflows, while Aftershoot, FilterPixel, and Narrative Select can speed up large shoots with AI-assisted analysis. The right choice depends on your budget, computer, editing program, and need for automation. Lightroom also includes assisted culling features that score factors such as subject sharpness and open eyes.
How is culling different for product photography?
Product culling focuses on accuracy and consistency rather than emotion. Images are judged by sharpness, product position, lighting, background, framing, color, and whether all required angles are covered. A visually attractive frame may still be rejected if it does not match the rest of the catalog.
Conclusion
Culling is the step that turns a large folder of photographs into a focused collection worth editing and delivering. It saves time, removes repetition, and helps the strongest images receive proper attention.
Start with a simple system on your next shoot. Reject obvious failures first, compare similar frames carefully, and keep only the images that add real value. Once that process becomes familiar, your entire photography workflow becomes easier to manage.